On Network (ONDC Integrated Logistics)
On Network fulfillment refers to orders that are shipped using logistics partners integrated with the ONDC (Open Network for Digital Commerce) platform. In this setup, sellers don’t need to manually arrange shipping the system automatically assigns a logistics provider once an order is confirmed. All shipping steps, including pickup, tracking, delivery, and status updates, are handled within the Mystore dashboard through a streamlined and standardized process. This ensures faster fulfillment, real-time tracking, and reduced manual effort for sellers.

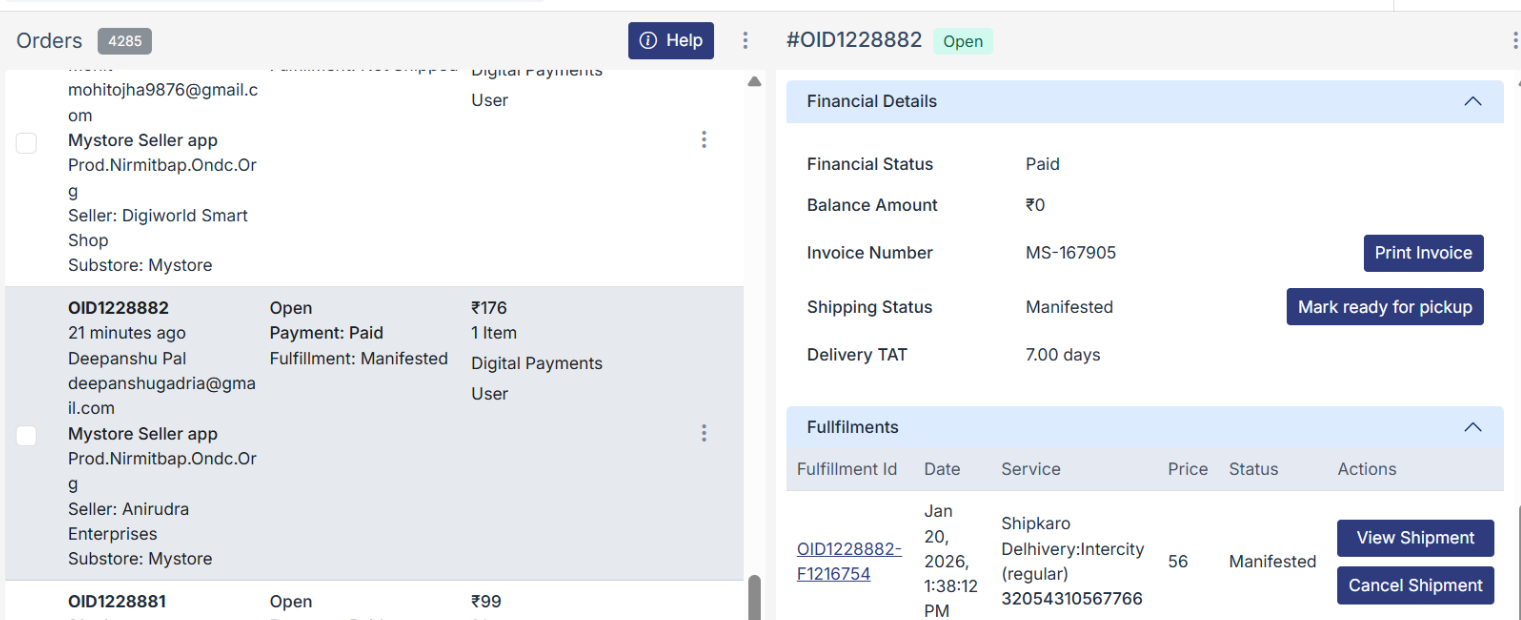
Ship an Order Using ON-Network Logistics (When fulfilment Status is Manifested)

1. Log in to Your Mystore Seller Admin
- Go to your Mystore Seller Admin Panel.
- Enter your login credentials to access your dashboard.
2. Access the Orders Section
- In the left-hand menu, click on “Orders.”
- Under the Open Orders tab, find the order with the fulfillment status marked as “Manifested.”
3. Open Order Details
- Click on the Order ID of the relevant order.
- A panel will open on the right showing the order details including product name, SKU, quantity, and shipping charges. Review all details carefully.
4. Generate the Invoice
- Click on “Generate Invoice.”
- A pop-up window will appear. Click “Generate” to create the invoice.
- Once generated, click “Download Invoice” to save a copy.
Print the invoice and include it inside the package.
5. Pack the Order
Pack the order securely according to the product type. Make sure it is properly sealed and ready for shipping.
6. Mark the Order Ready for Pickup
- Once the order is packed, click on “Mark Ready for Pickup.”
- This will notify the logistics partner that the package is ready for pickup.
7. Download and Print the Shipping Label
- Under the Fulfillment section, click on “View Shipment.”
- A new window will open. Click “View Shipping Label.”
- Then click “Download Shipping Label.” Print the label and attach it securely to the package.
8. Upload Package Image
- Take a clear photo of the packed product with the shipping label visible.
- Click on “Upload Package Image” to upload the picture.
9. Save the Shipment
Once all uploads are complete, click “Save.”
That’s it! Your order is now successfully shipped using ON-Network Logistics. The logistics partner will be notified and will proceed with the pickup.
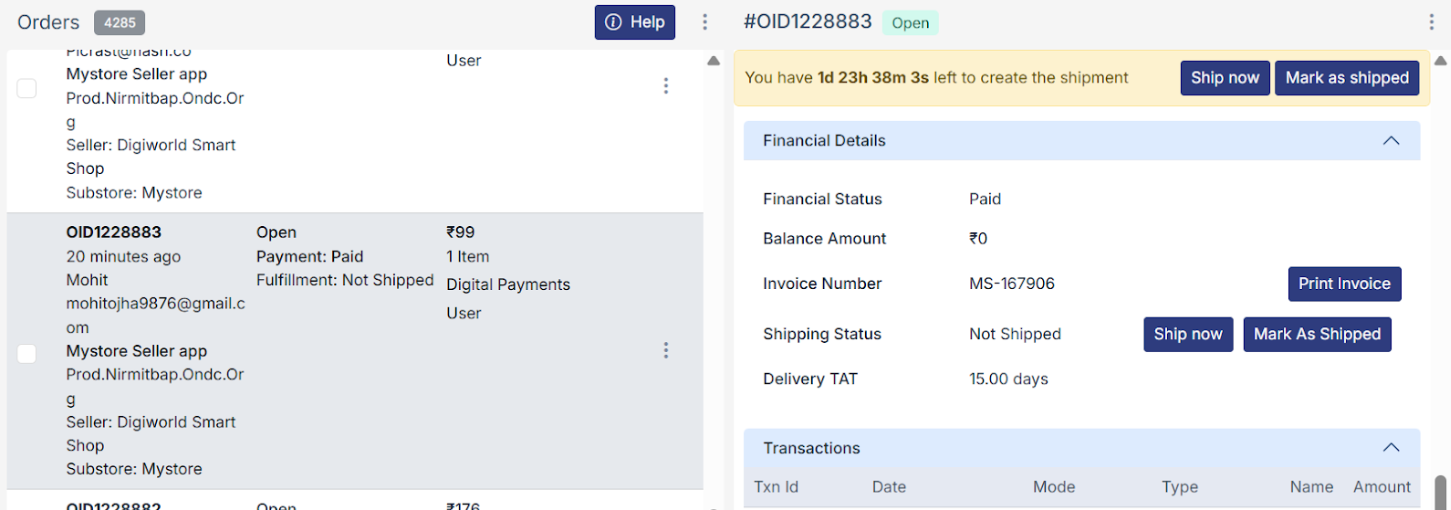
Ship an Order Using ON-Network Logistics (When order fulfillment is not shipped)

1. Log in to Your Mystore Seller Admin Panel
- Go to your Mystore Seller Admin Panel.
- Enter your login credentials to access your dashboard.
2. Access the Orders Section
- From the left-hand menu, click on “Orders.”
- Under the “Open Orders” tab, find the order you want to ship and click on the corresponding Order ID.
3. Review Order Details
- A panel will open on the right displaying all order details.
- Review information such as product name, SKU, quantity, and the shipping charges paid by the customer.
4. Generate the Invoice
- Scroll down and click on “Generate Invoice.”
- If you want to notify the customer, click on “Send Invoice.”
- Then click “Generate” to create the invoice.
- Click “Download” to save the invoice for printing.
5. Start the Shipping Process
- Click on “Ship Now” to begin fulfillment.
- A new tab will open with three sections: Pickup Address, Delivery Address, and Package Details.
6. Select Pickup and Confirm Shipping Details
- Under Pickup Address, select your store location from the available options.
- The Customer’s Address and Package Details will be auto-filled.
- Review the details and click “Fetch Rates.”
7. Choose a Shipping Rate
- Select a shipping rate that is equal to or less than what the customer paid.
- If you choose a higher rate, you will be responsible for the extra cost.
- After selecting the rate, proceed to schedule the pickup.
8. Confirm Shipment
- A new tab will open. Click on “Ship Now.”
- A confirmation message will appear indicating that your shipment has been created.
9. Download and Print Shipping Label
- Click on “View Shipping Label.”
- The label will automatically download to your system.
- Print the label and securely attach it to the package.
That’s it! You have now successfully shipped an order using ON-Network Logistics.
