Store Settings
The Storefront page helps sellers set up the basic details of their storefront. These settings control your store’s identity, branding, contact information, and essential preferences that are visible to customers. Use this section to ensure your store information is accurate and ready before going live.
1. Go to Storefront settings
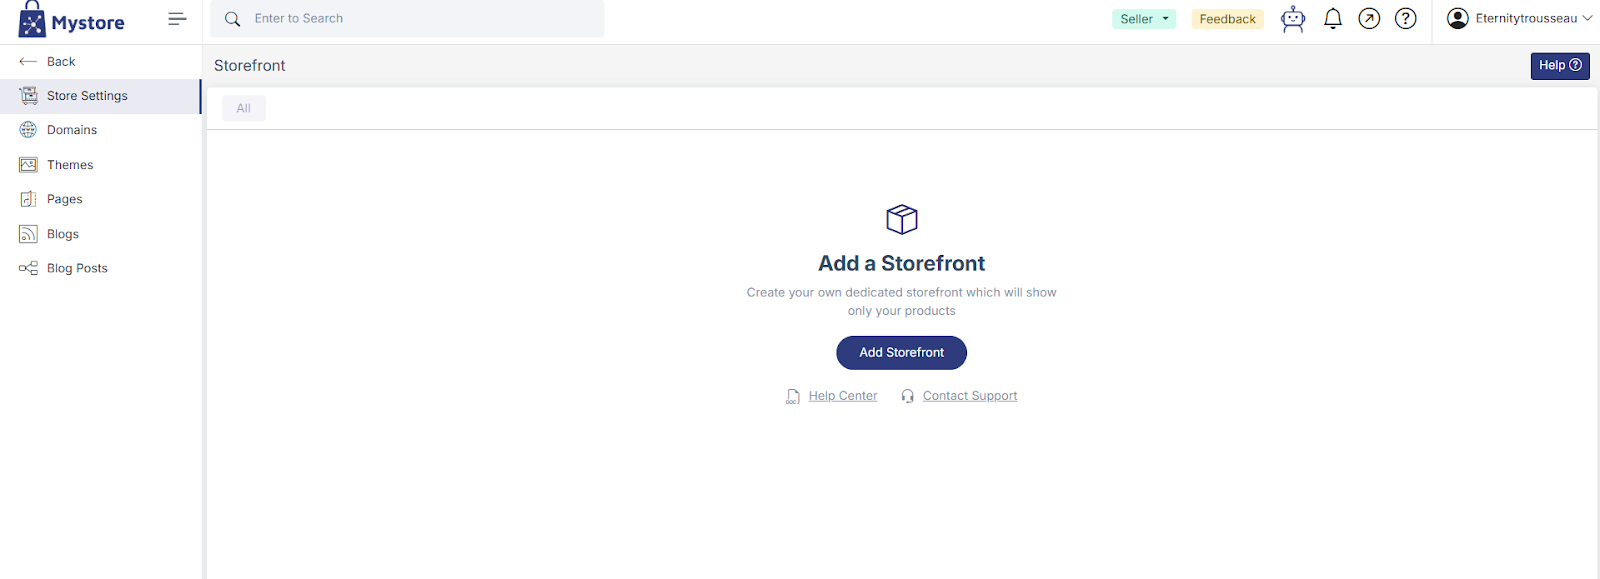
- From your Mystore dashboard, open the Storefront menu.
- Select Store Settings from the list. It will show the following page.

2. Add or edit a storefront
Click the Add Storefront button (or select an existing one to edit). The Store Configuration form will appear.

3. Fill in Store Information

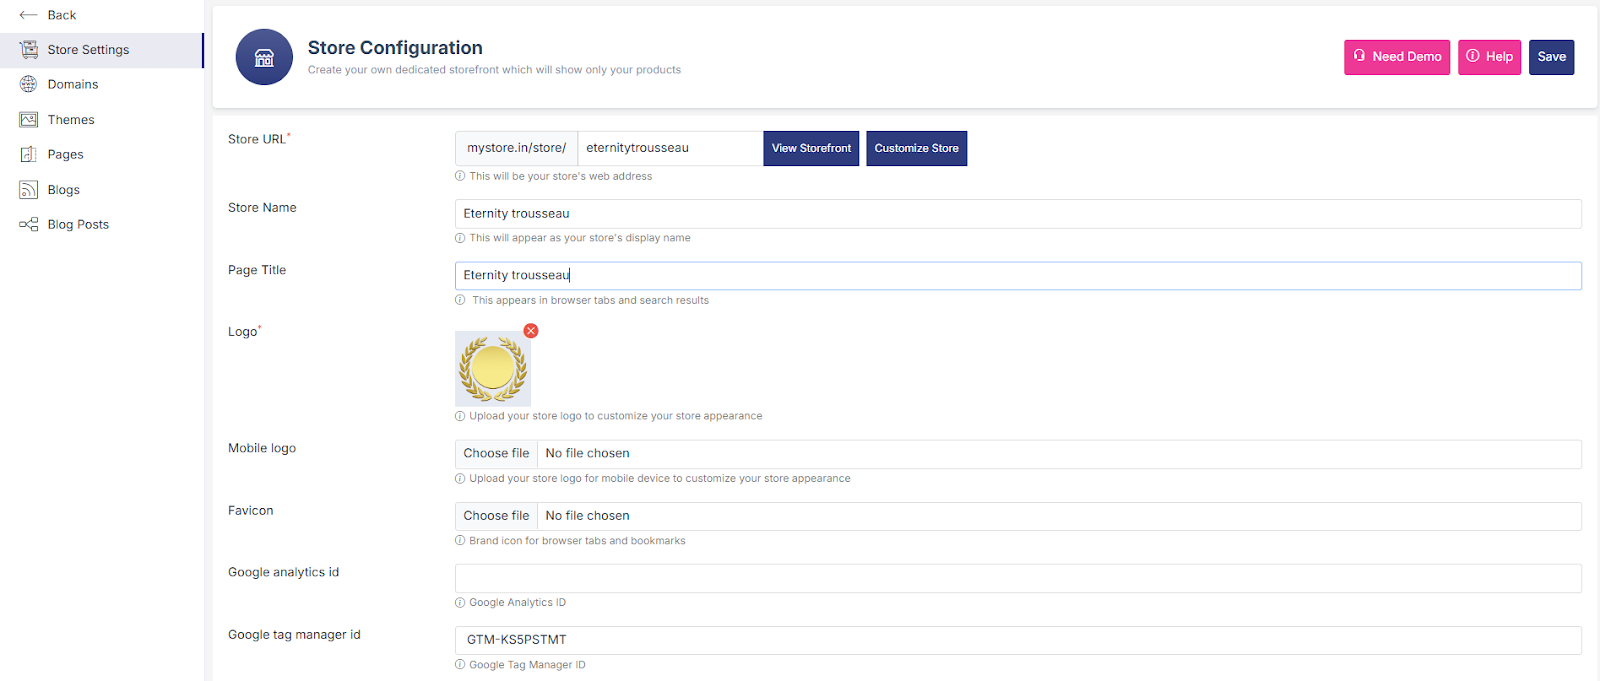
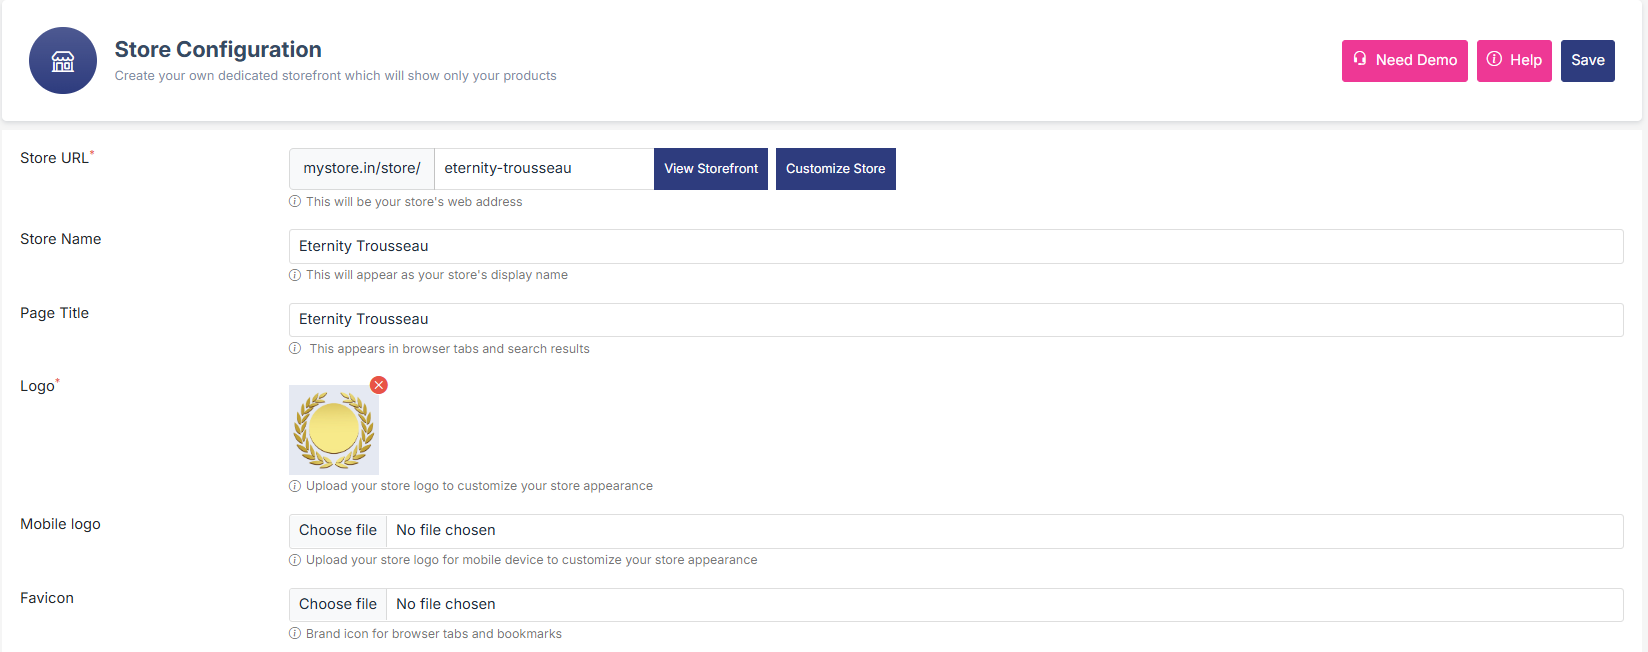
Store URL: Enter the desired web address for your store (example: mystore.in/store/). In case you do not have any specific URL, we generate a default URL for the store.
Store Name: The display name of your store. This name is shown on your storefront and customer-facing pages.
Page Title: Displayed on browser tabs and search engine results. Recommended to keep it relevant to your brand for better search visibility.
Logo: Upload your main store logo. This logo appears in the storefront header and represents your brand.
Mobile Logo: Upload a logo specifically optimized for mobile devices. Ensures proper display on smaller screens.
Favicon: A small icon shown in browser tabs and bookmarks. It is recommended to upload a square image for best results.
Analytics & Tracking
Mystore storefronts are SEO-ready with features like meta tags, clean URLs, and fast-loading pages to improve search visibility. Analytics and tracking on a website allow collecting and analyzing data about how users interact with your site, so you can understand performance and improve the experience.

Google Analytics ID: Enter your Google Analytics Tracking ID to monitor visitor traffic and performance.
- Configure Google Analytics for Traffic Insights
- Access Google Analytics and retrieve your GA4 Measurement ID (format: G-XXXXXXXXXX)
- Enter the ID in the "Google Analytics ID" field
- Save changes and check real-time reports within Google Analytics to confirm data collection
- Monitor traffic sources, user behavior, conversion paths, and revenue attribution
Google Tag Manager ID: Add Google Tag Manager for Advanced Tracking. To add your GTM ID to manage analytics and marketing tags efficiently, follow these steps:
- Copy your Container ID from the Google Tag Manager dashboard (format: GTM-XXXXXXX)
- Input the ID in the "Google Tag Manager ID" field and save
- Use GTM Preview mode to test container firing and tag deployment
- Deploy custom event tracking, conversion pixels, and third-party integrations without code
Facebook Pixel ID: Helps track conversions and supports Facebook ad campaigns. Set up Facebook Pixel for retargeting by following these steps.
Open Meta Events Manager and copy your Facebook Pixel ID
Paste the Pixel ID into the "Facebook pixel ID" field in Store Settings
Click Save to activate tracking
Verify installation using the Meta Pixel Helper browser extension
Start retargeting website visitors with precision ad campaigns
Contact Email: This email address is used for customer communication and system notifications.
Contact Phone: Phone number displayed on the storefront for customer support.
Default Store Location:Select the primary location of your store. This location may be used for delivery, pickup, and map display. Store locations can be managed from Settings > Store Locations.
Social Links:The Social Links section allows you to add links to your social media profiles on your store. These links help customers connect with your brand on social platforms like Facebook, Instagram, and LinkedIn. Social media helps in building trust and credibility for your store and lets customers explore your brand beyond the store.

Provider: Select the provider you want to map on the website from the dropdown
Link: Enter the complete URL of your social media profile.
Then click on Insert social links.
Google Maps API Key: Required to display location maps on the storefront. Enter a valid Google Maps API key if map functionality is needed.
Meta Tags (SEO): Meta tags are small pieces of information added to your website that help search engines understand your store and show it correctly in search results. It also helps improve your store’s visibility on search engines. Click Add Record to add a meta name and corresponding content.

In the Meta Tags section, you can add meta elements by clicking the Add Meta Tag button.
Proceed to add the keywords for the homepage. Enter "keywords" in the Name field.
Add the keywords in the Content
field. You can add multiple keywords, separated by a comma.- Click the Insert Meta Tag button to add the keywords.
Languages (available only in the Basic plan and the Enterprise plan)
Select the languages supported by your storefront:
- Basic Plan - up to 2 languages
- Enterprise Plan - up to 7 languages
Currencies (available in Basic and above plans): The Currency section allows you to choose the currency in which product prices will be displayed on your storefront. Select the preferred currency for your store (for example, INR, AED, or USD).
Hide Out-of-Stock Products: Enable this option to automatically hide products that are unavailable.
Store Description: Add a short description of your brand and offerings. This helps customers understand your store and build trust.
4. Saving Changes:
ClickSave to apply and store all updates.

- Click View Storefront to preview your store.
- Click Customize Store to update the storefront design.
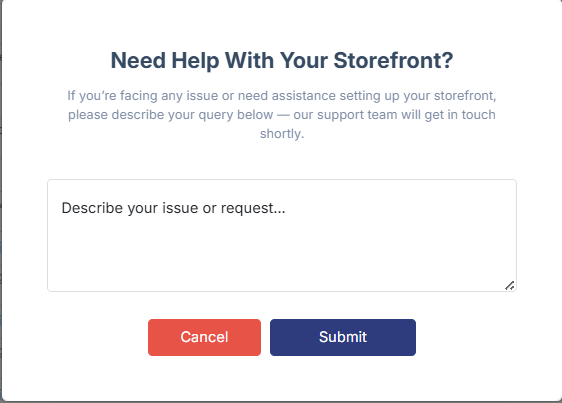
Need demo: Click on demo if you need assistance in setting up. It will open the following form. Use this form to contact the Mystore support team if you face any issues or need assistance with setting up or managing your storefront.

Help: Click Help to access support resources such as guides, FAQs, and assistance for any issues related to store configuration. It will redirect to the Mystore help center.
