
BOT Agents
The Bot Agents section lets you set up and manage AI-powered chat assistants for your store. You can customize how an agent behaves, control how it looks, choose what it can do for your customers, and decide exactly where it appears on your site.
To access Bot Agents, go to Dashboard > AI Section > Bot Agents.
Understanding the Three Tabs
The Bot Agents section is organized into three tabs:
- All: Every agent in one place, both global and custom.
- Global: Platform-managed agents available across all stores. These act as ready-made template : for example, a Shopping Agent for product discovery or a Help Center Agent that answers customer queries from your help content.
- Custom: Agents you have created yourself, either from scratch or by duplicating a global agent.
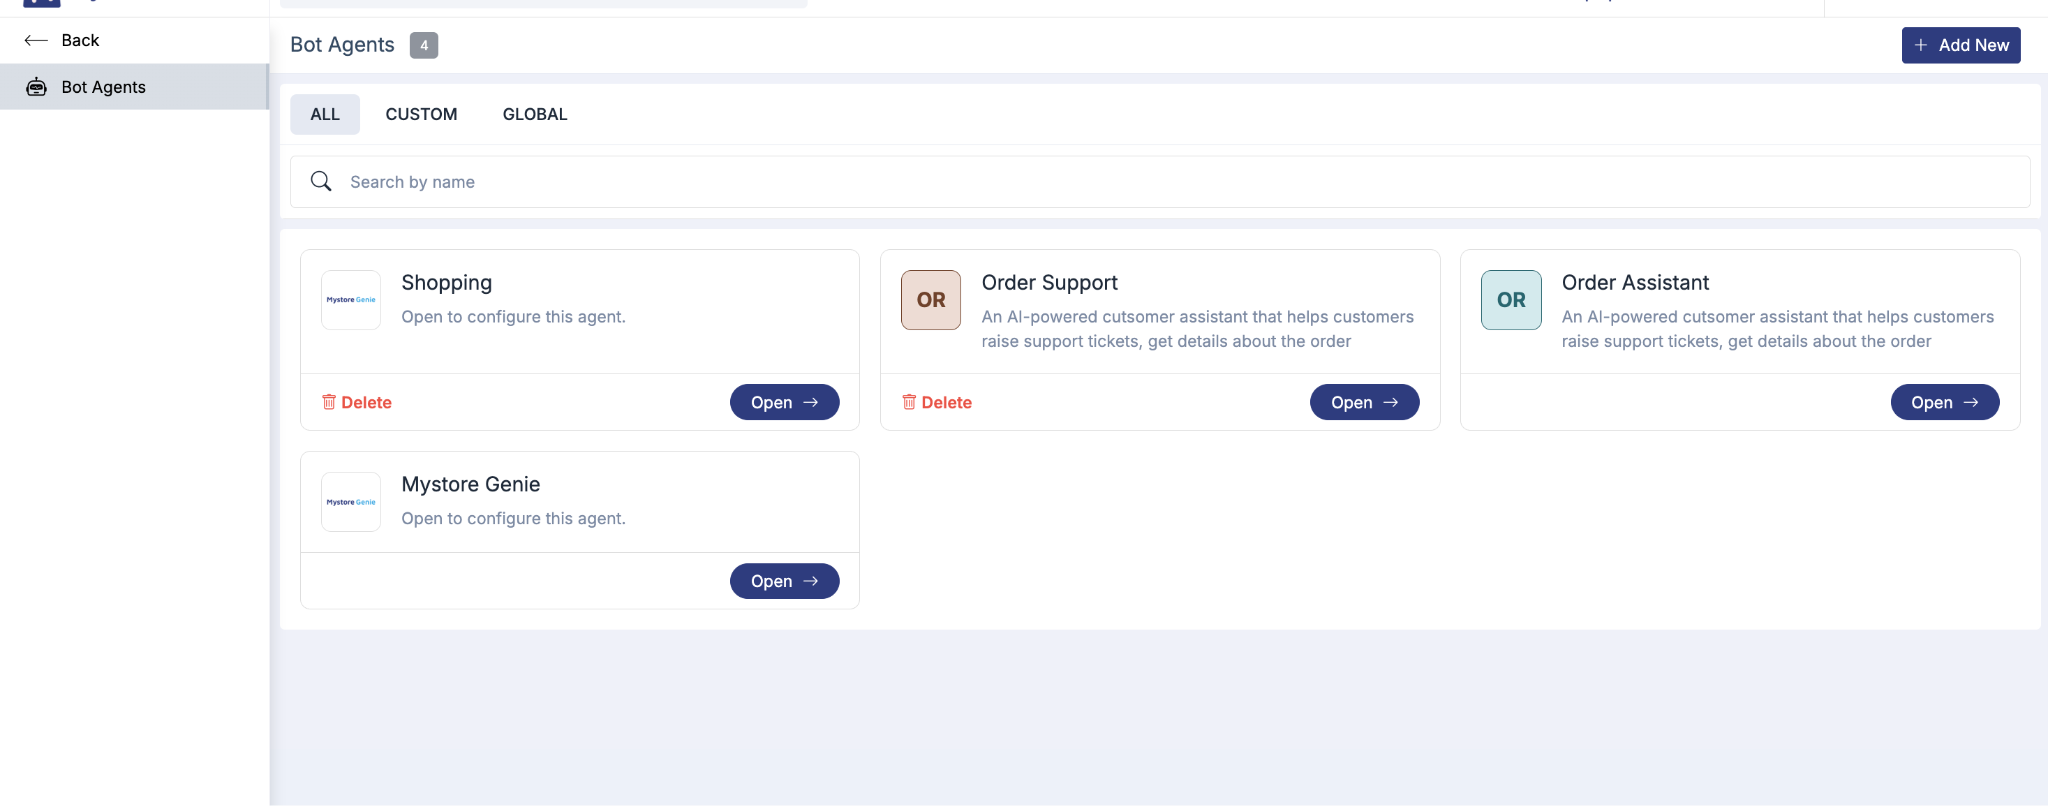
Note: Global agents cannot be edited directly. To customize one, you must duplicate it first. Your copy will then appear in the Custom tab.
Creating an Agent
You have two ways to create a custom agent.
Option 1: Build From Scratch
Click the + Add New button at the top of the Bot Agents page. This opens a blank editor where you configure every setting yourself.
Option 2: Duplicate a Global Agent
Start from a platform-provided template and make it your own:
- Go to the Global tab and click the agent you want to start from.
- When prompted, select Duplicate.
- Your copy appears in the Custom tab and in All.
- Open the duplicated agent to begin configuring it.
Configuring Your Agent
When you open a custom agent, a full editor window loads. It is organized into the following sections.
General
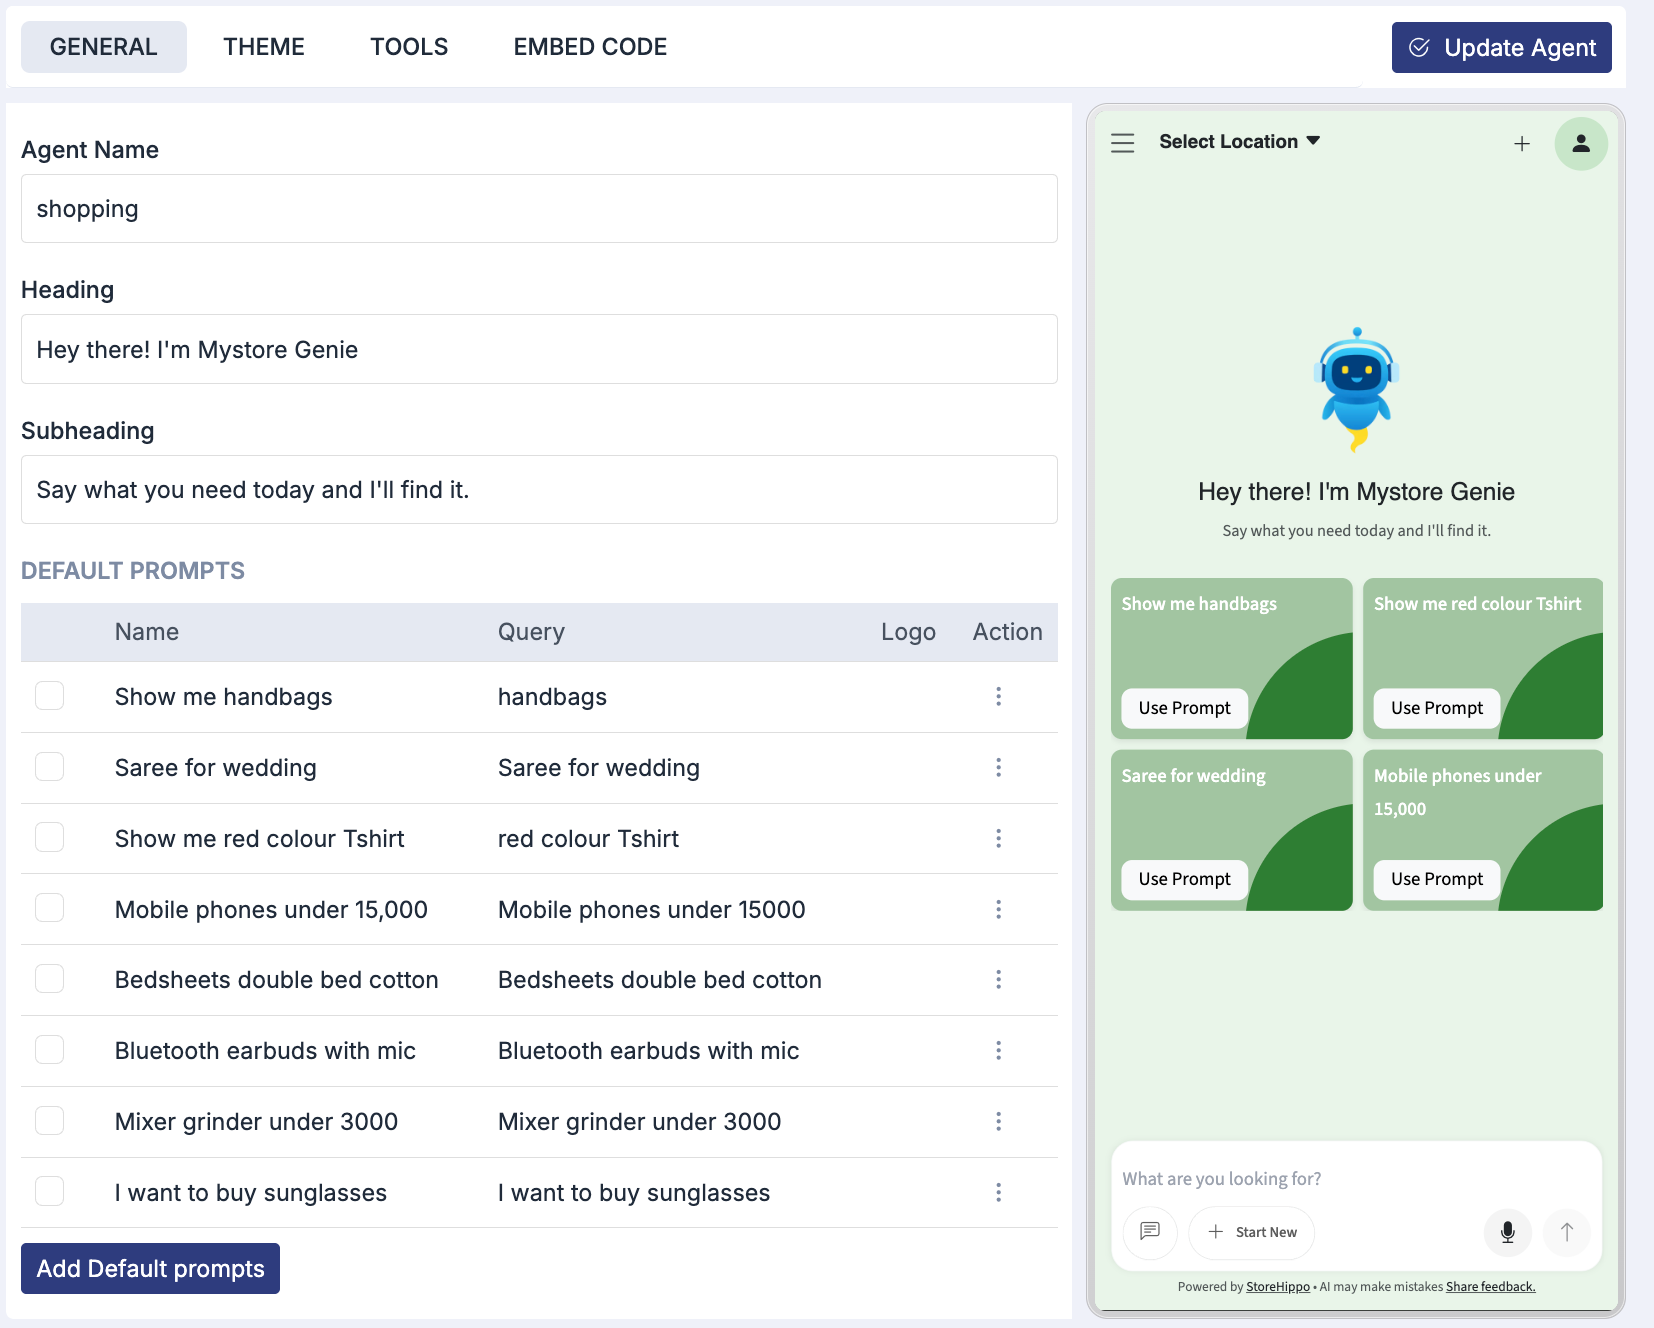
Agent Name: A name to identify this agent in your dashboard, such as “Storefront Shopping Assistant.” It is for your reference only.
Heading & Sub-Heading: The title text shown at the top of the chat widget : for example, your store name or “Hi, how can we help?”
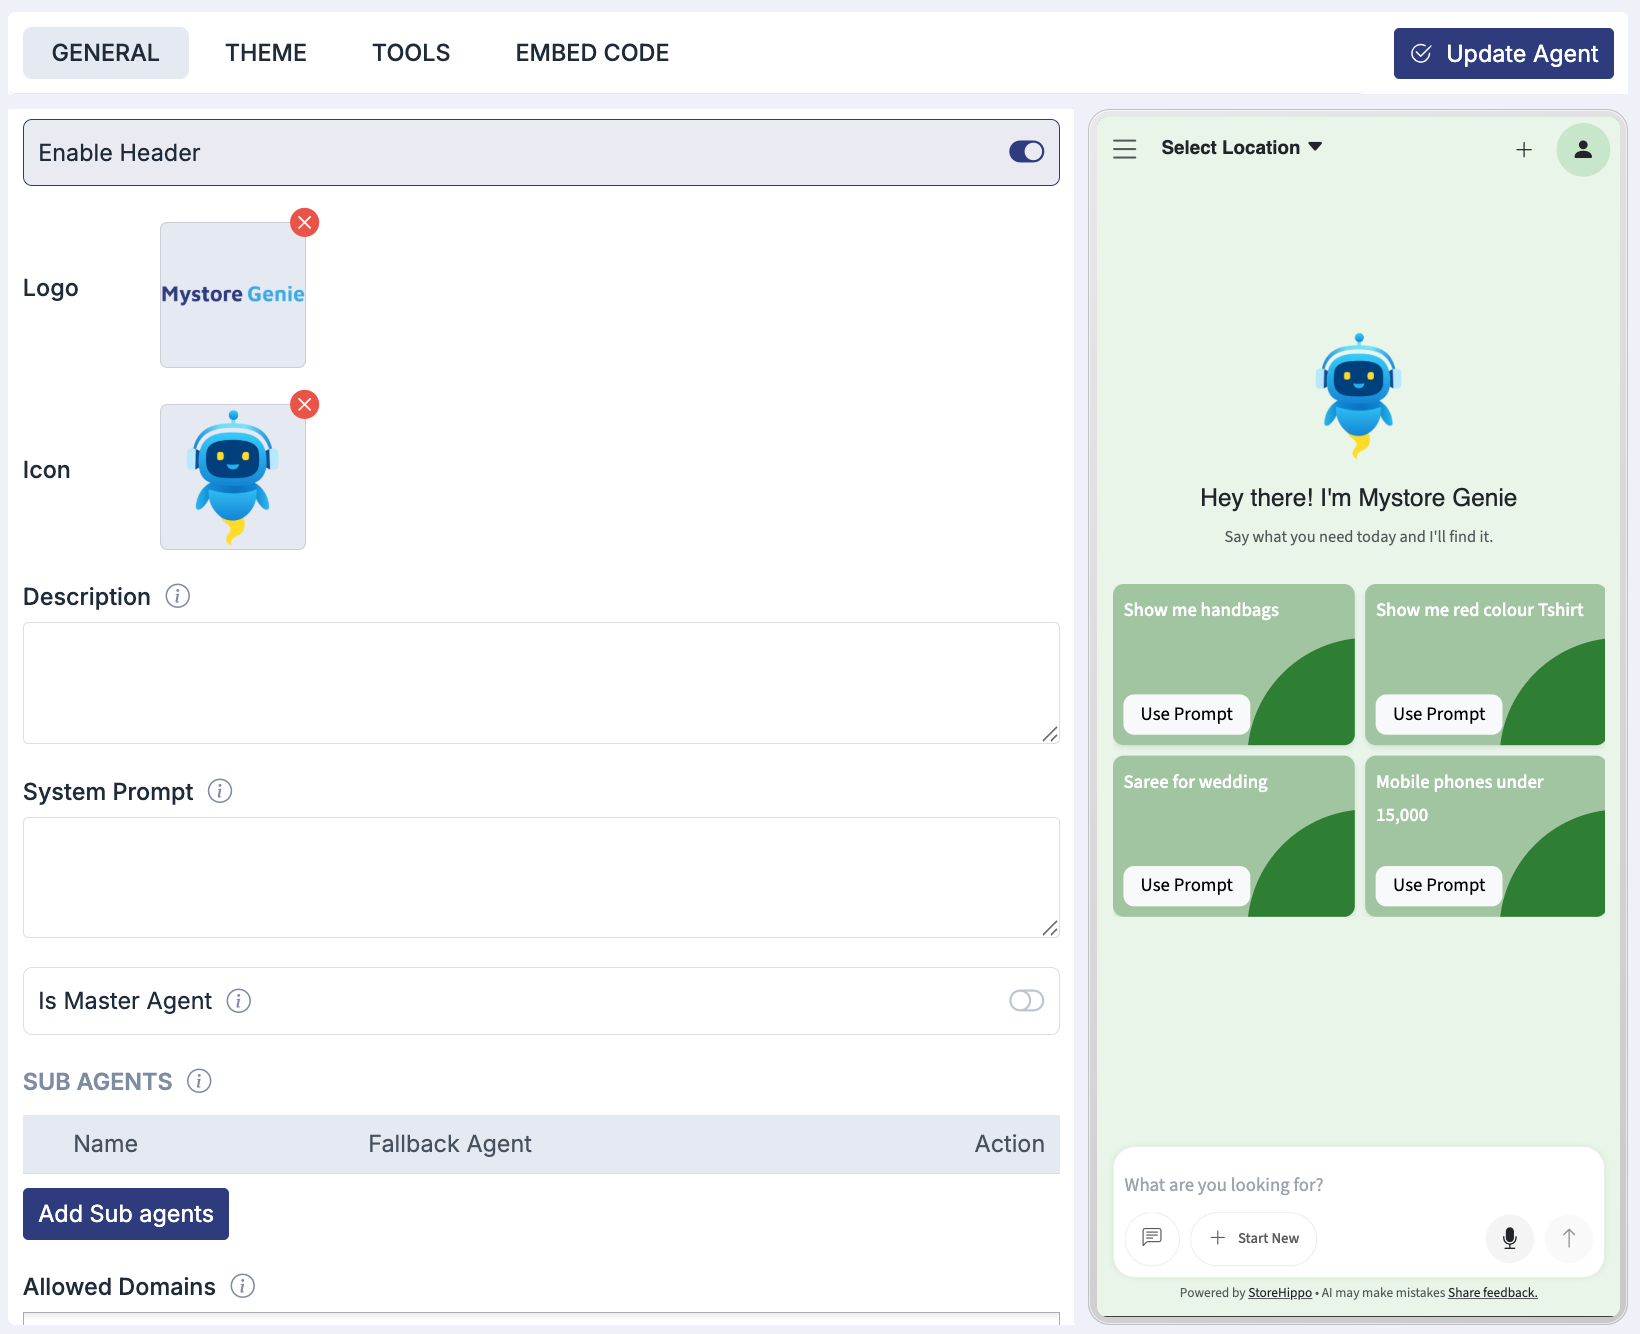
Logo & Icon: Brand the widget with your store logo and a chat icon to match your storefront.
Default Prompts: Quick-start buttons on the chat home screen. Tapping one sends that message automatically. For example:
- Show me new arrivals
- Track my order
- What is your return policy?
Add Logo: Upload your logo image: a square PNG or JPG works best. It appears in the widget header.
Description: A short internal note describing what this agent does. Visible only to you, not to customers.
System Prompt: Core instructions that set the agent’s tone, scope, and rules: for example, only answer product questions or always reply in a friendly tone.
Master Agent: Enable this to make the agent a coordinator that manages sub-agents and delegates tasks across more complex workflows.
Sub-Agents: Child agents the master agent can call for specific tasks. Only relevant when Master Agent is enabled.
Allowed Domains: The domains where the agent may load. Any domain not listed is blocked. Add your store domain before embedding.
Theme
The Theme tab controls how the chat widget looks and which interface elements appear. It has a theme selector at the top and two sub-tabs under UI Options: UI Settings and Colour Schema. The live preview on the right updates instantly as you make changes.
Select Theme: Choose from 10 pre-defined themes, each with its own colour scheme. Changes preview live before you save.
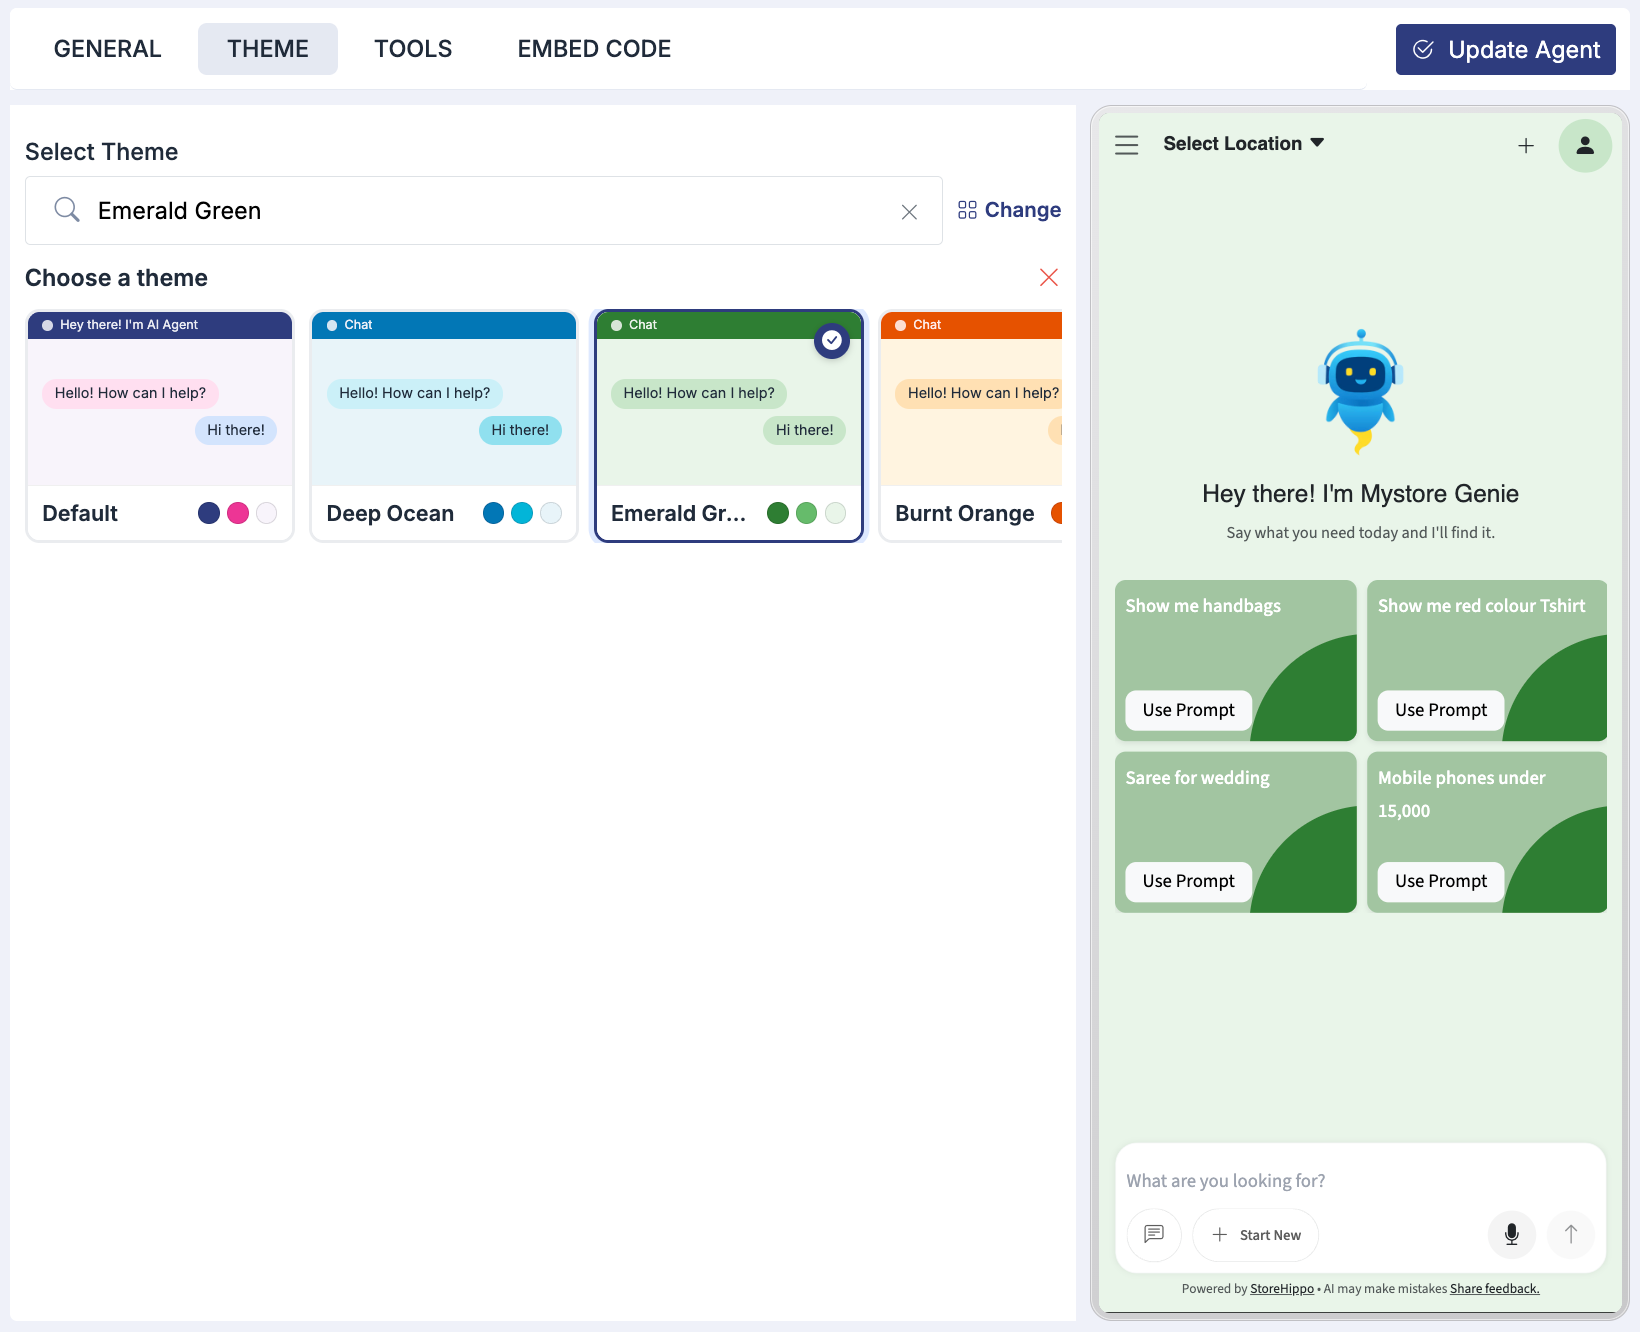
Note: Themes control the widget’s colour scheme only. Custom colour changes are not available at the seller level: pick the pre-defined theme that best matches your storefront.
Tools
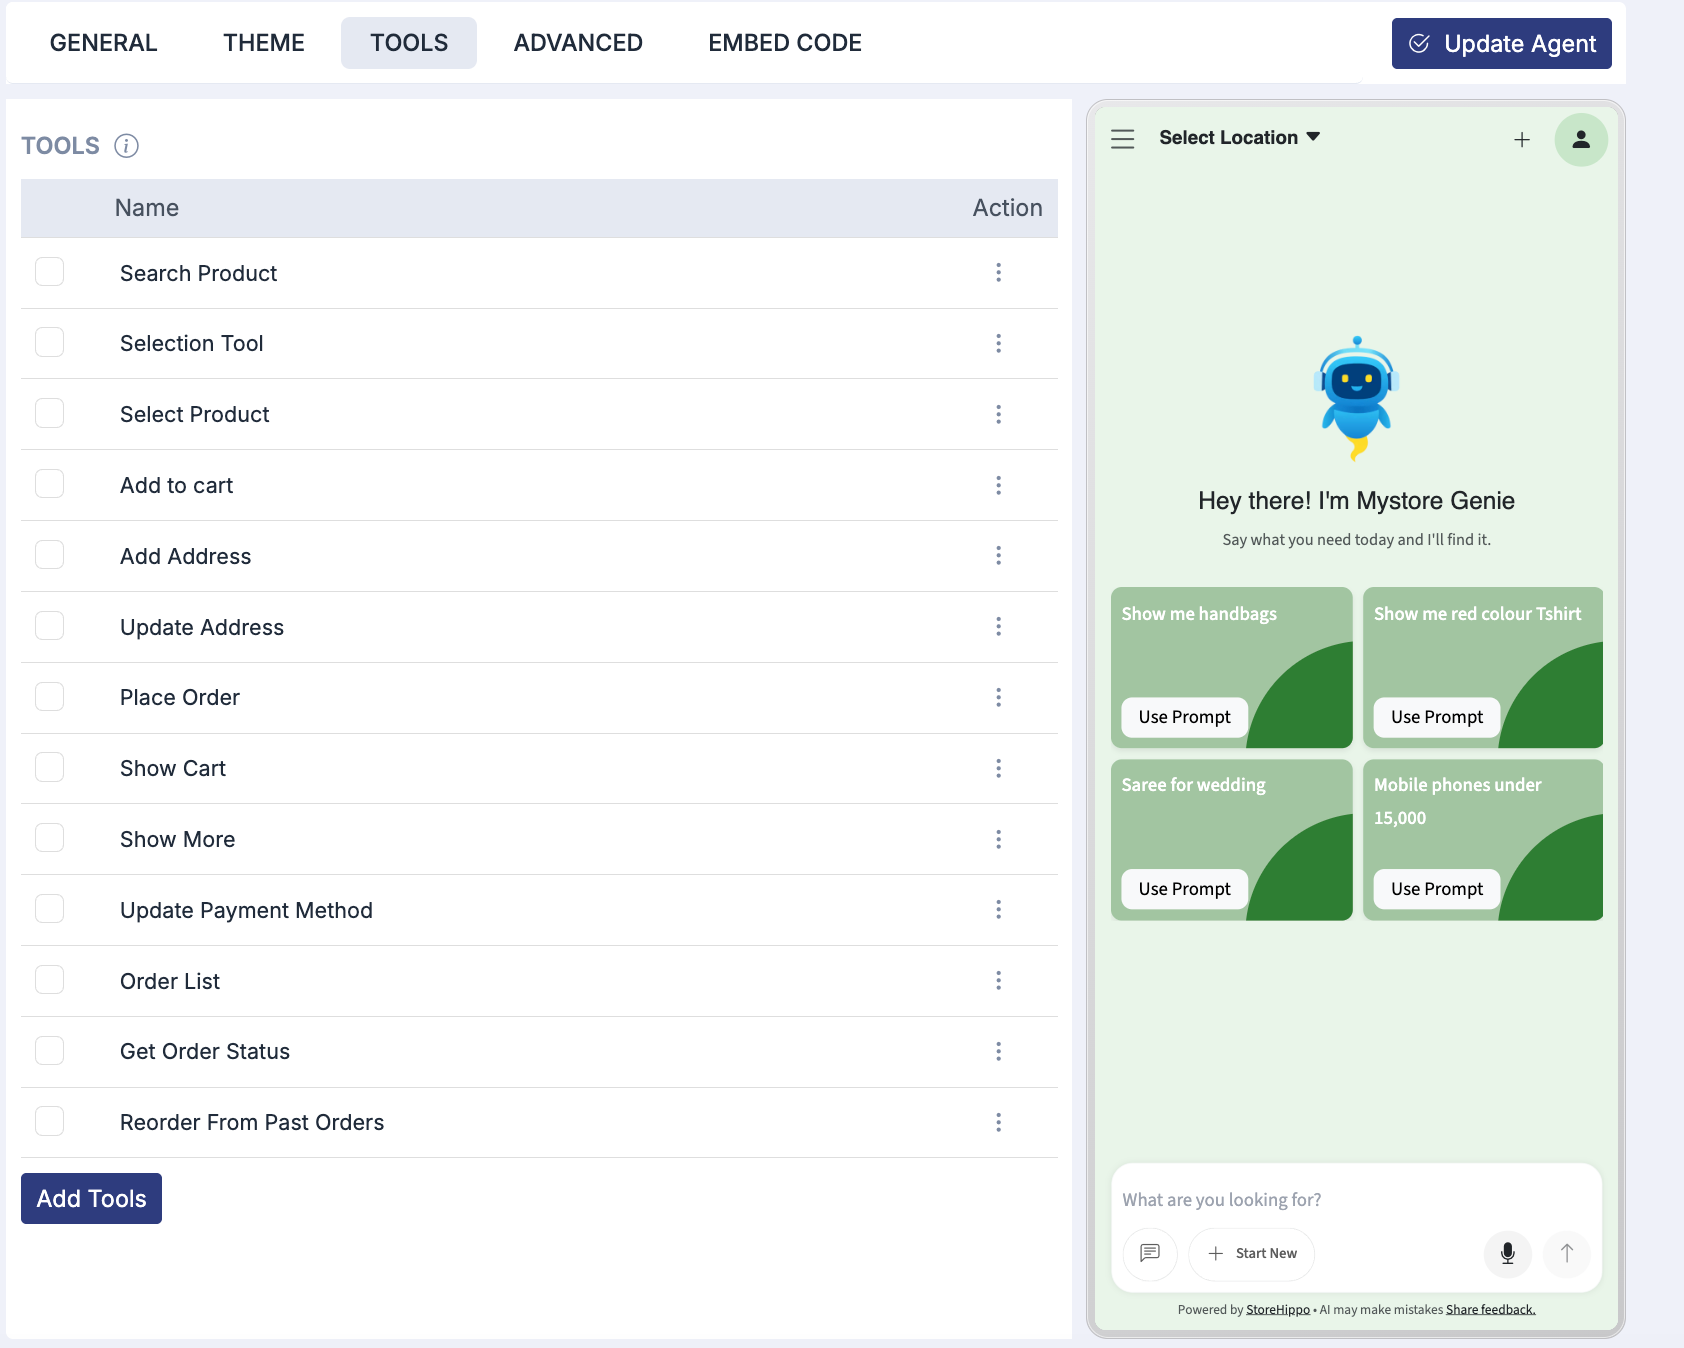
Tools extend what your agent can do beyond answering questions, such as searching products, adding items to a cart, or fetching order details. The AI automatically decides which tool to use based on what the customer asks; no manual triggering is needed.
You can attach multiple tools to a single agent. Tools come in two forms:
- Pre-built tools: Ready-to-use actions provided by the platform, such as product search, order lookup, and help-center search. Toggle the ones you want on.
- Custom tools: Define your own action when a pre-built tool doesn’t cover your use case. Give it a clear name and description so the agent knows when to use it.
Embed Code
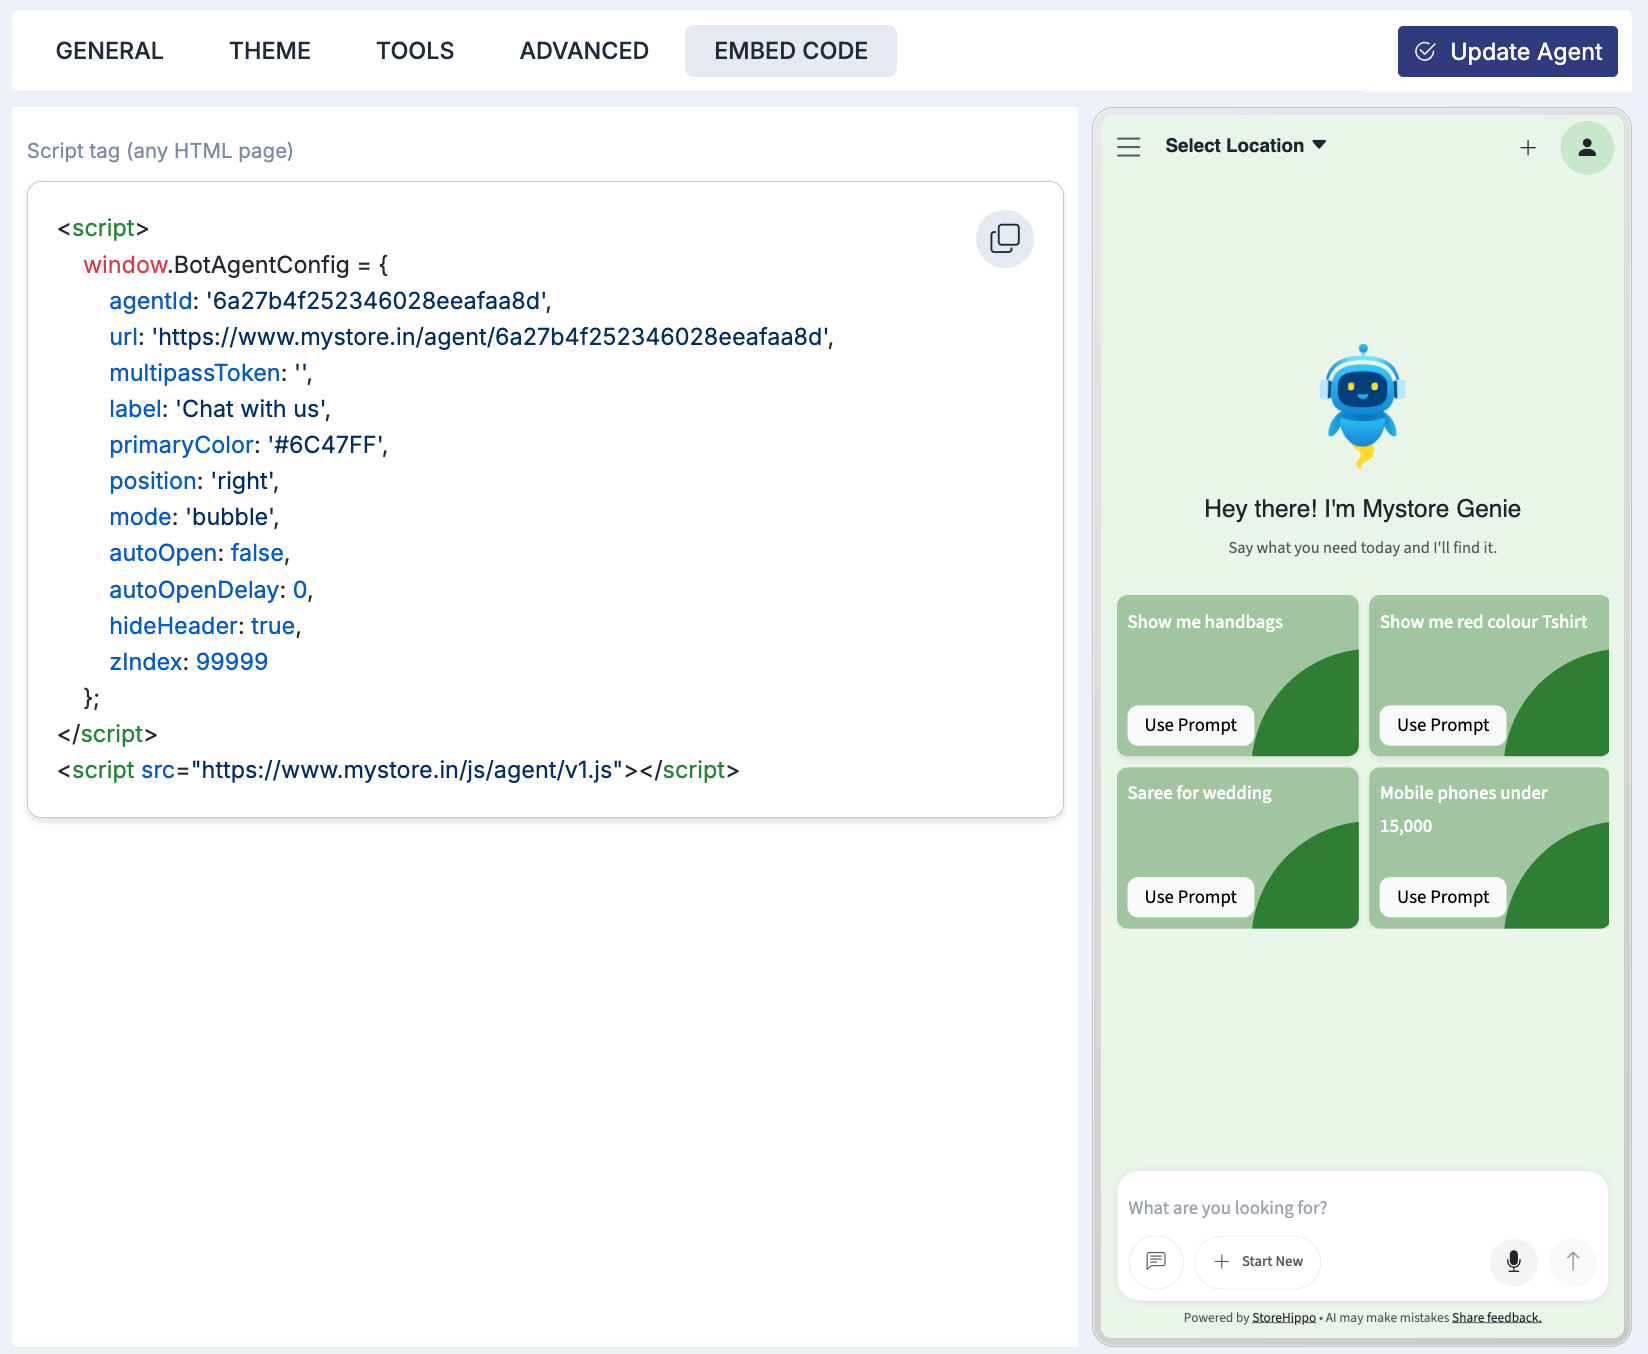
Open the Embed Code section, copy the script, and paste it into any page or store theme to activate the widget. You can embed it in two ways:
- Floating widget: A chat bubble on every page. Best for a D2C storefront.
- Inline embed: The agent renders inside a chosen page or section. Best for a B2C landing or product page.
Note: Add the domain where you embed the script to Allowed Domains, or the agent won’t load.
Tips for Getting the Best Results
- Write a clear, specific System Prompt to keep the agent focused on your store's needs.
- Use Default Prompts to guide customers towards your most common queries and reduce support load.
- Always preview your theme before saving to ensure the widget matches your store's look and feel.
- Check the Allowed Domains list every time you embed the agent on a new domain or subdomain.
- If you want to test changes without affecting your live store, duplicate the agent first and configure the copy.