
Seller Signup
Creating a Mystore seller account takes about two minutes: a phone number, an email address and a password. You start on the ONDC network for free, and you can unlock the other channels whenever you are ready.
1. Create your account
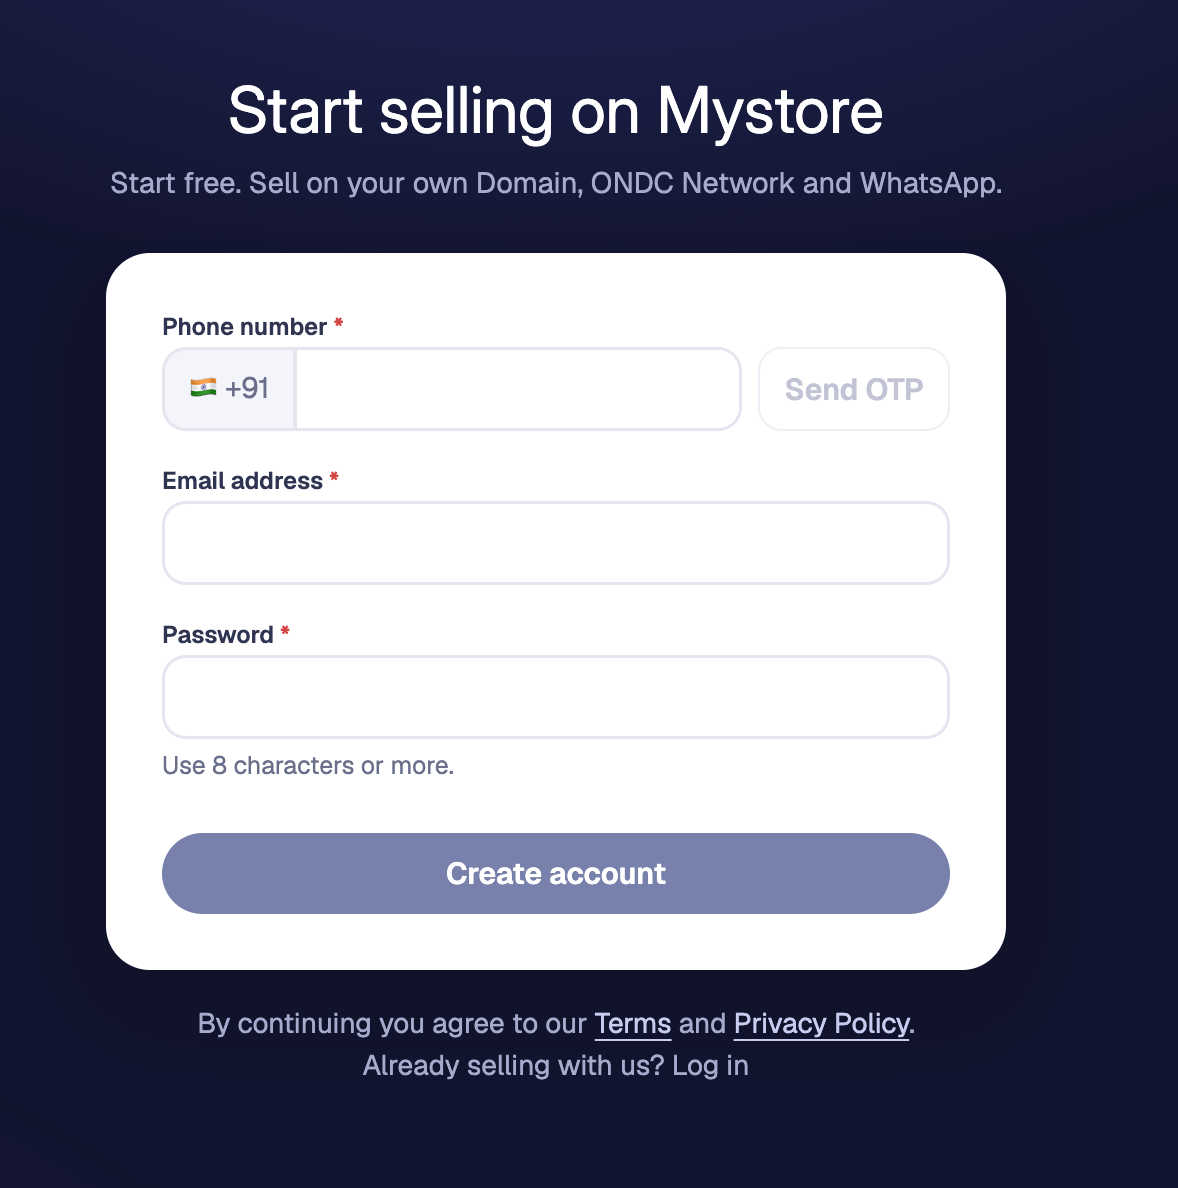
Go to the seller registration page and fill in three fields:
- Phone number: Enter your 10-digit mobile number and click Send OTP. Enter the OTP you receive to verify the number. Once verified you will see a green Phone verified tick. Use Change if you entered the wrong number.
- Email address: This becomes your login ID and the address where we send order and account notifications.
- Password: Use 8 characters or more.
Then click Create account.
Already have an account? Use the Log in link at the bottom of the form.
2. Choose your channels
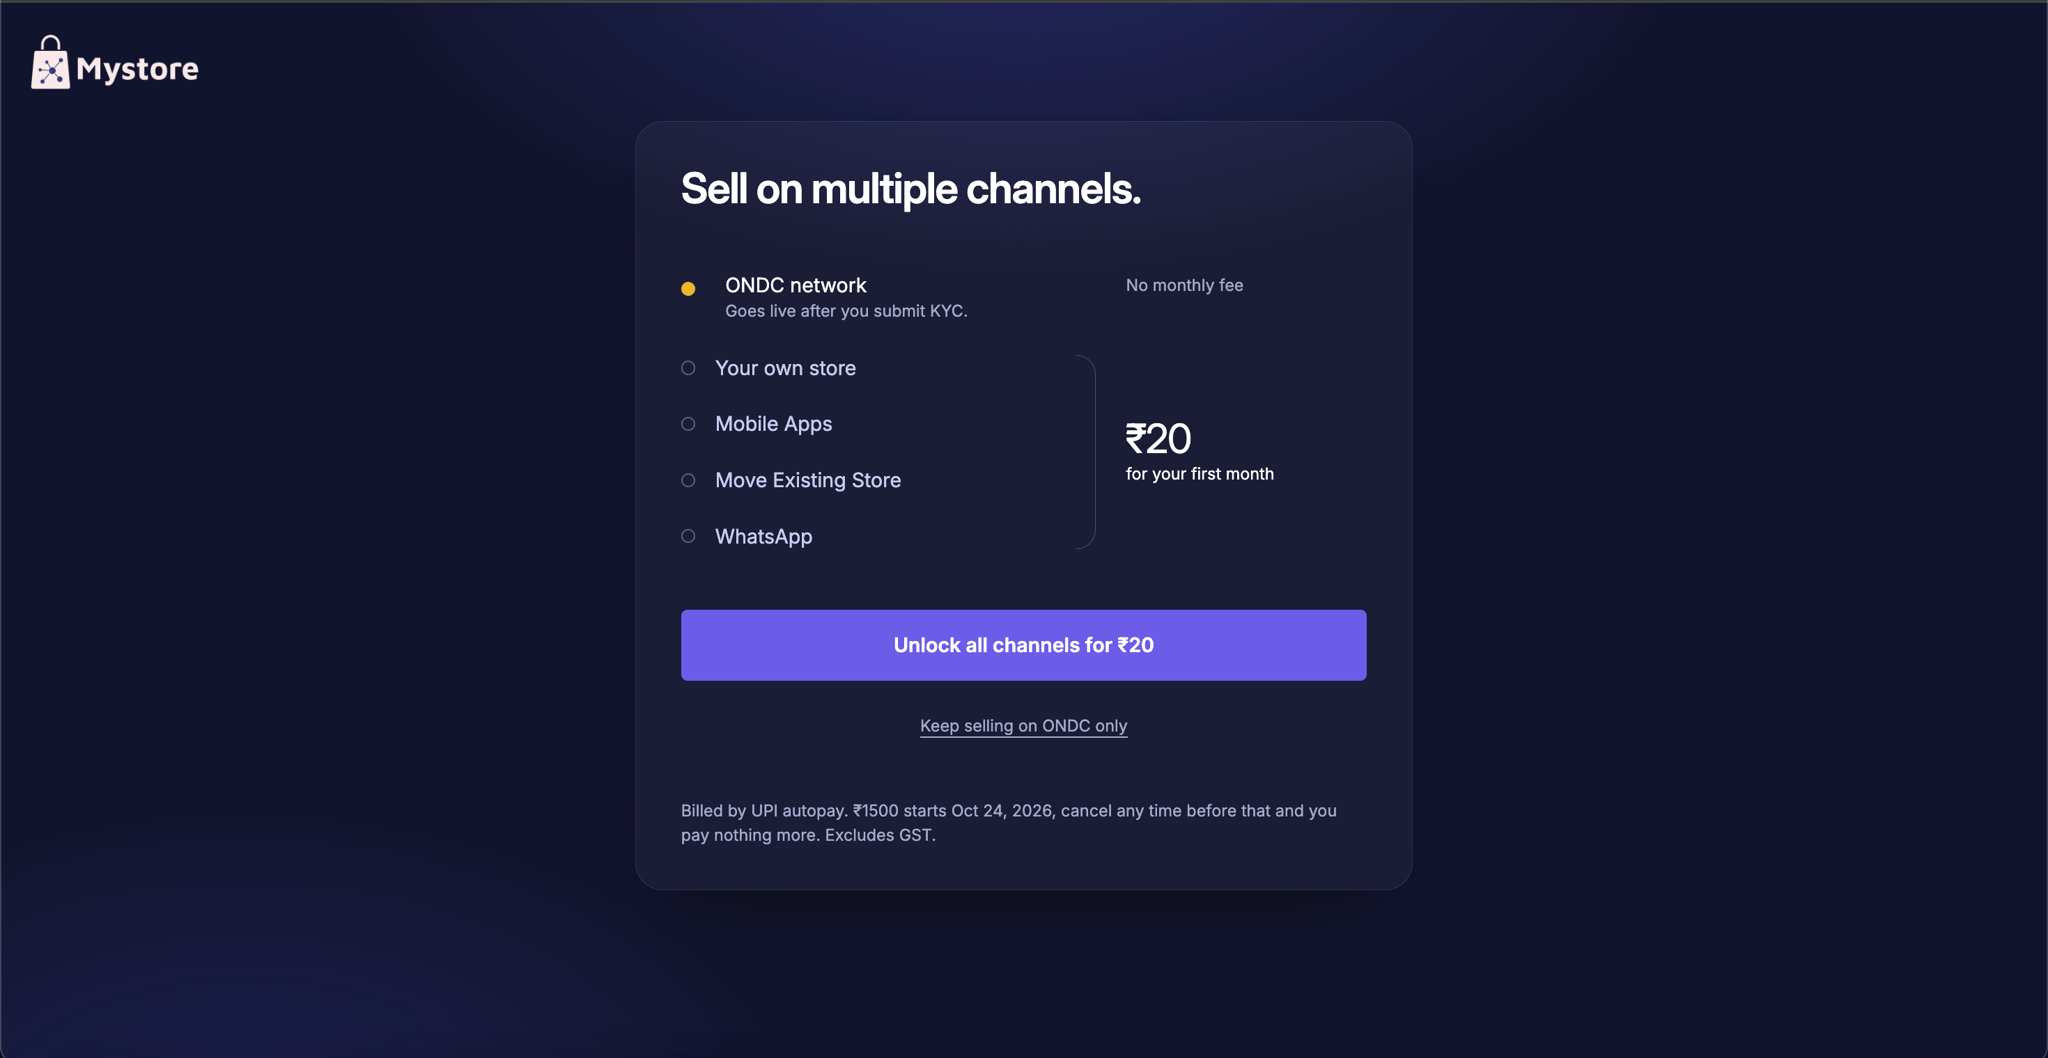
The next screen is Sell on multiple channels. ONDC network is already selected for you and has no monthly fee - it goes live once you submit your KYC. The remaining channels are unlocked together with a subscription.
Channel | What it does | Cost |
|---|---|---|
ONDC network | Sell across ONDC buyer apps. Selected by default. Goes live after you submit KYC. | No monthly fee |
Your own store | Your own branded D2C website. | Included when you unlock all channels |
Mobile Apps | Your store as an Android / iOS app. | |
Move Existing Store | Migrating from another platform. Our team helps you bring your catalog across. | |
Sell and take orders over WhatsApp. |
You have two ways forward:
- Unlock all channels - opens every channel at an introductory first-month price. Go to step 3 to add your billing address and pay.
- Keep selling on ONDC only - skips payment and takes you straight to your dashboard with ONDC enabled. You can unlock the other channels later from Plans And Billing.
The note under the buttons tells you how billing works: payments are collected by UPI autopay, the regular monthly rate starts on the date shown, and you can cancel any time before that date and pay nothing more. Prices exclude GST.
3. Add your billing address (only if you unlock all channels)
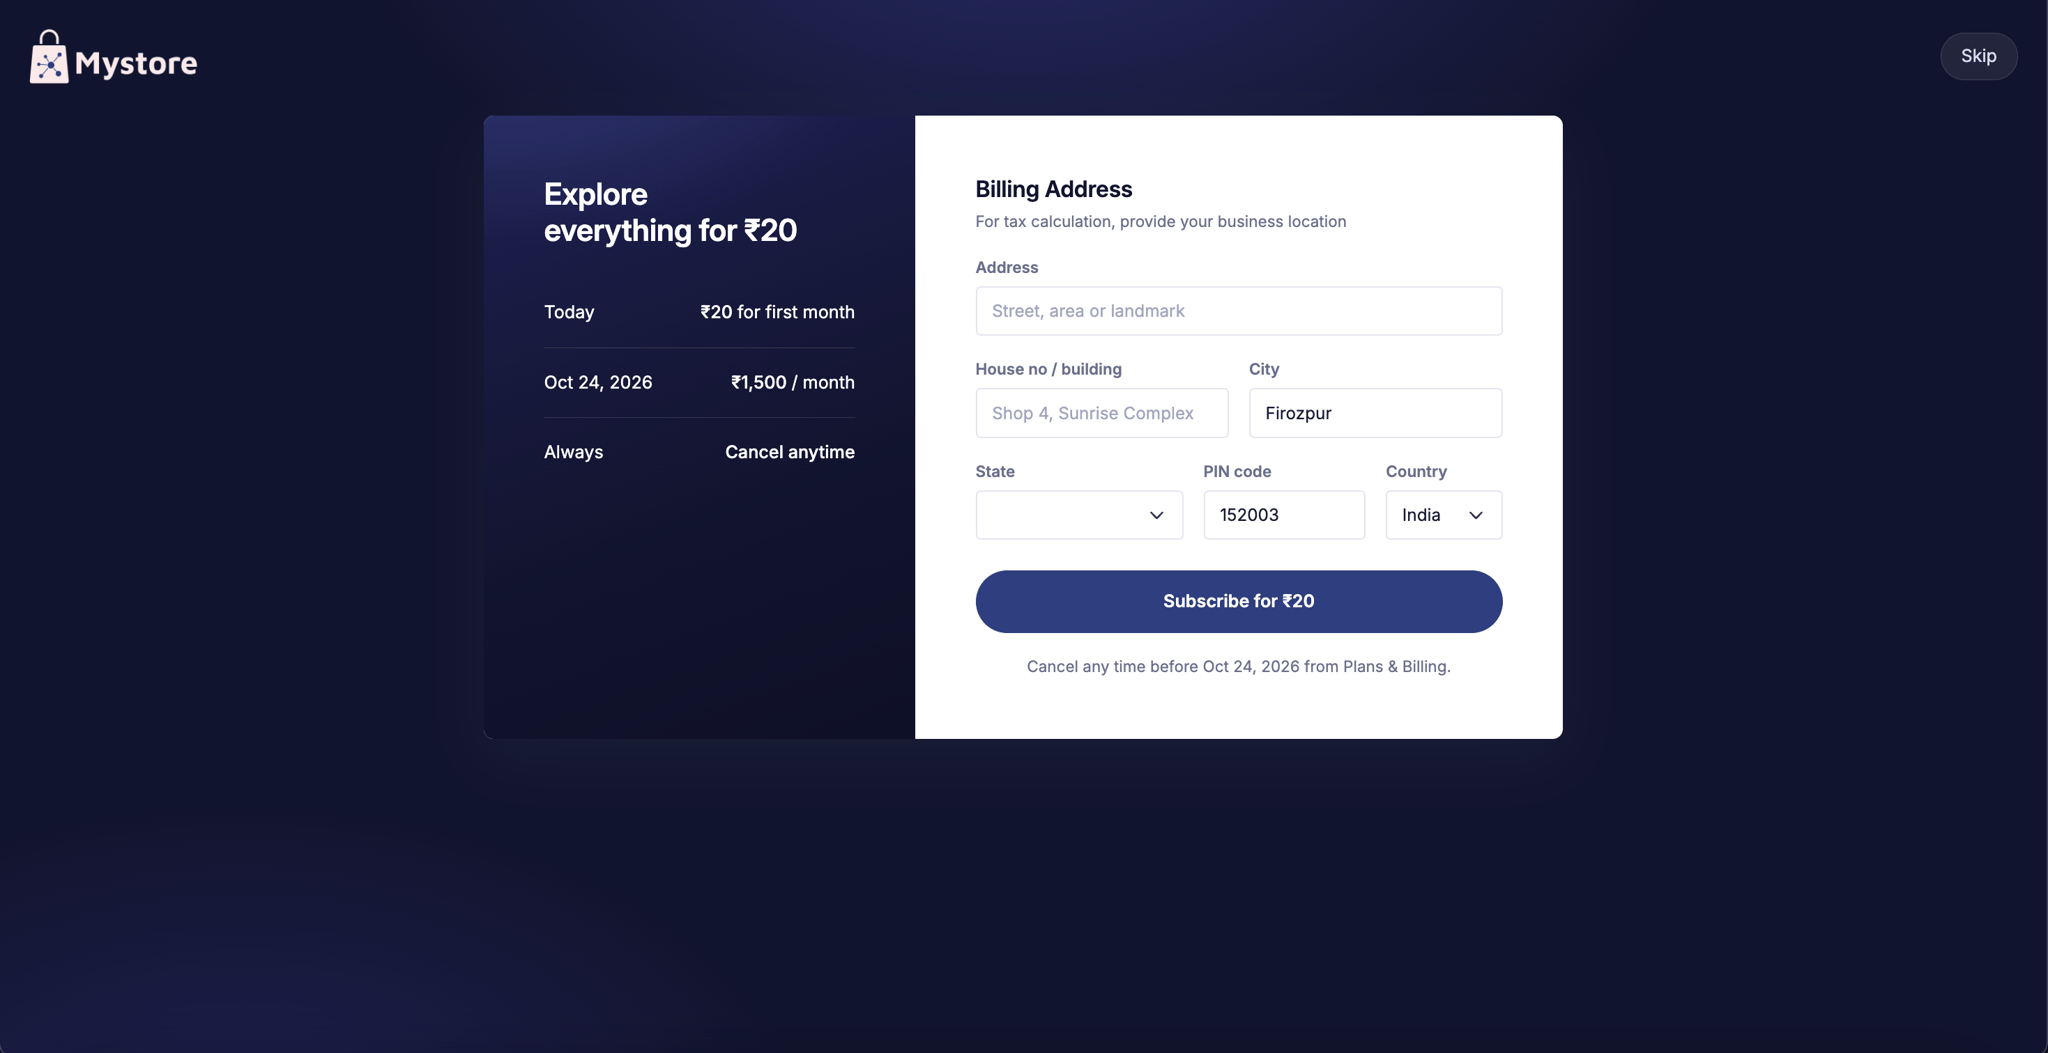
We need your business location to calculate tax. Fill in:
- Address - street, area or landmark
- House no / building
- City, State, PIN code and Country
The panel on the left summarises the deal before you commit - what you pay today, what the regular monthly price becomes and the date it starts, and that you can cancel at any time. Click Subscribe to pay.
Changed your mind? Skip at the top right takes you to your dashboard without paying, with ONDC still enabled.
4. Your dashboard
Whichever route you took, you land on your dashboard - Welcome to Mystore. Let's get you selling. Your channels are listed under Sales Channels in the left panel.
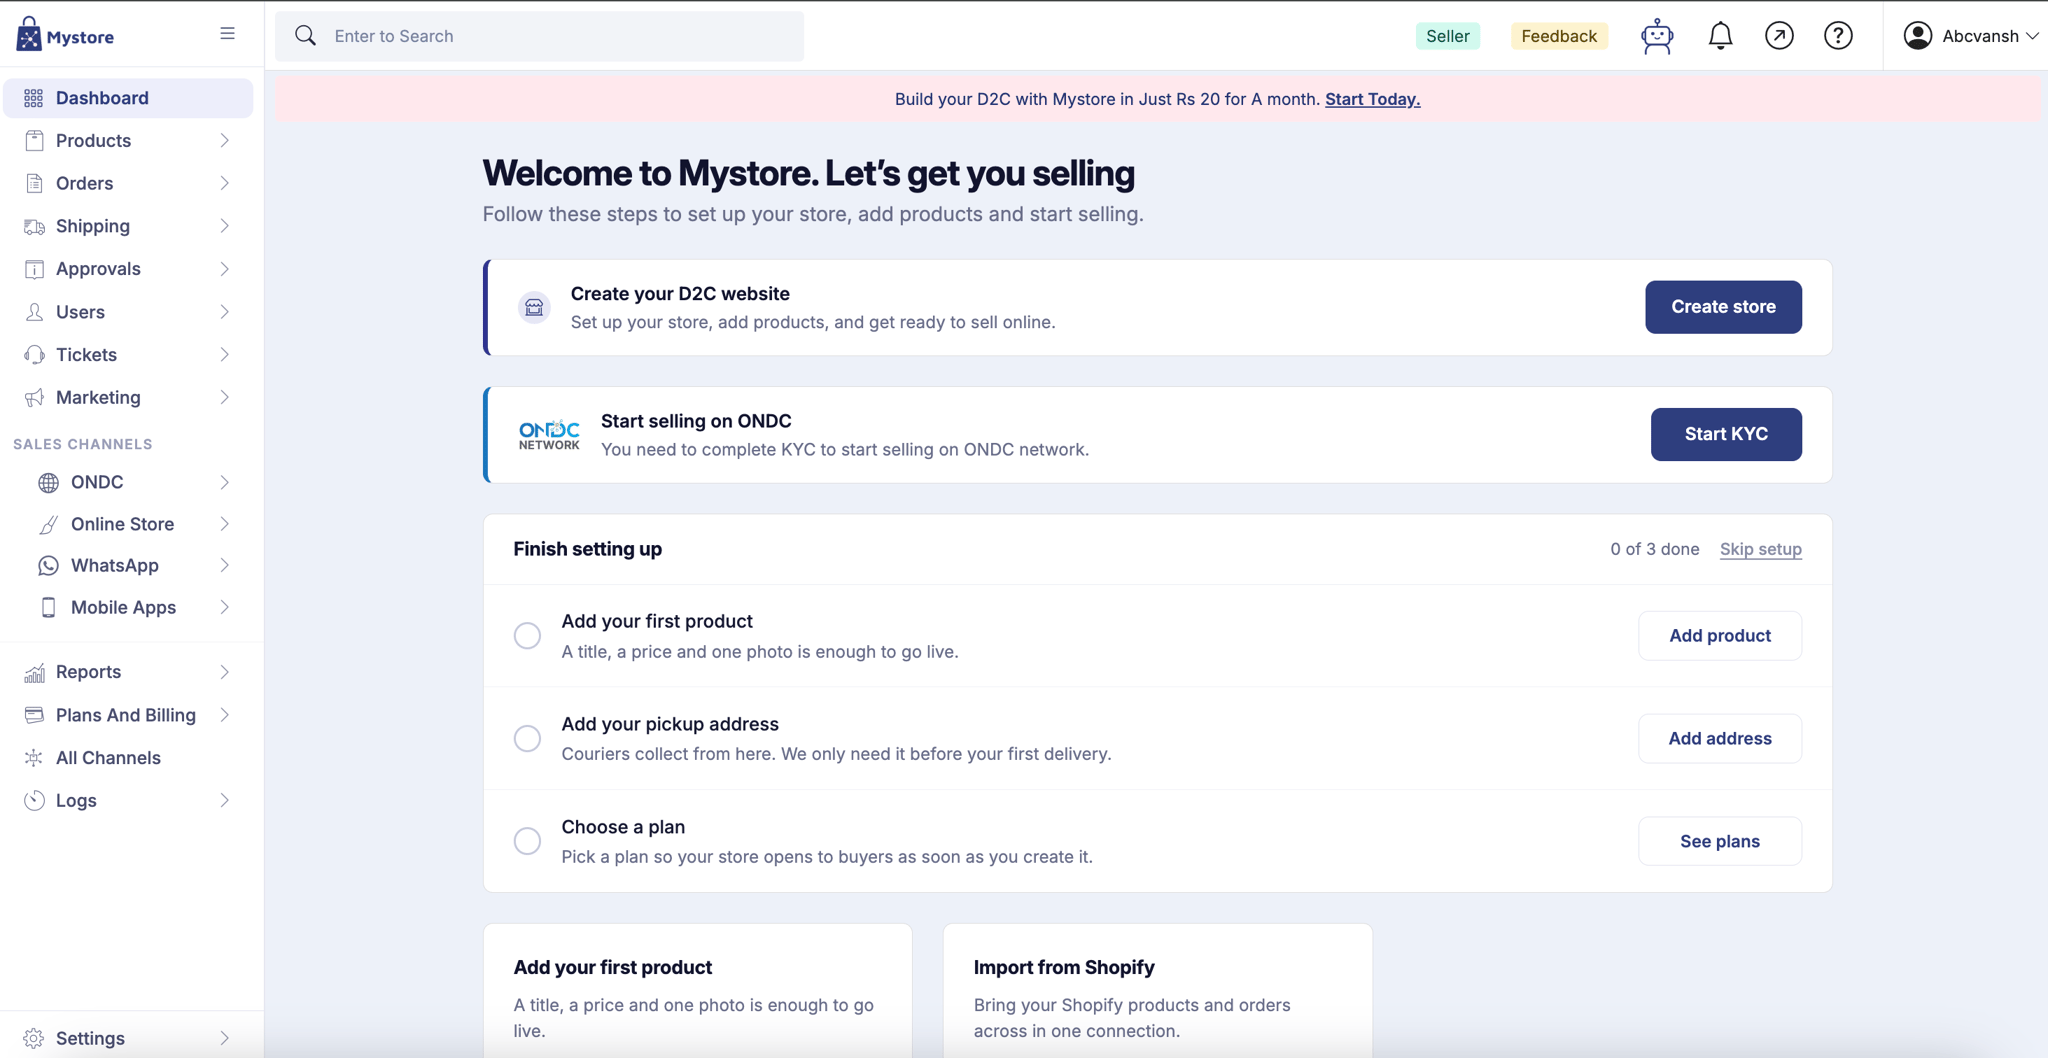
Three things to look at first.
Create your D2C website
The first card. Click Create store to set up your storefront, add products and get ready to sell online.
Start selling on ONDC
The second card is your reminder that KYC is still pending. You cannot sell on the ONDC network until it is submitted and approved. Click Start KYC to begin - see section 5.
The “Finish setting up” checklist
A three-item to-do list with a counter showing how many are done.
Task | What it is for | Button |
|---|---|---|
Add your first product | A title, a price and one photo is enough to go live. | Add product |
Add your pickup address | Couriers collect from here. We only need it before your first delivery. | Add address |
Choose a plan | Pick a plan so your store opens to buyers as soon as you create it. | See plans |
Use Skip setup to hide the checklist. The tasks themselves stay available from the left panel, so nothing is lost.
Below the checklist are two quick-start cards: Add your first product, and Import from Shopify, which brings your Shopify products and orders across in one connection.
5. Enable ONDC selling (KYC)
KYC is not part of signup - it is a separate step you complete when you are ready. Start it from the Start selling on ONDC card on the dashboard, or from ONDC under Sales Channels in the left panel.
Have it ready? If you already have your GSTIN and bank details to hand, add them now. Our team reviews your submission and approves your listing, usually within 1–2 business days - after that your catalog goes live across ONDC buyer apps.
Step 1 - Business details
Choose your tax registration type:
- GST registered: Enter your 15-digit GSTIN and click Verify. It is checked against the GST portal.
- Non-GST (intra-state): For sellers without GST registration, selling within their own state.
You can also upload a store logo here (PNG, JPG or SVG). This is optional.
Step 2 - Bank account for settlement
ONDC settles your sales directly into this account. Enter your account number, click Verify, and enter the IFSC code.
Step 3 - Pickup address
Select a saved pickup address from the dropdown. If you have not added one yet it will show No pickup address yet - click Add address to create it.
Step 4 - Accept ONDC seller terms
Tick the box to accept the ONDC Seller Terms (catalog standards, return-policy norms, and dispute resolution via the ONDC protocol), then submit for approval.
6. Handy tips
- You do not have to pay to get started. Skipping the unlock screen still gives you a working ONDC seller account.
- Keep documents ready before starting ONDC KYC: your GSTIN (or non-GST details), bank account number and IFSC, and a pickup address.
- ONDC approval usually takes 1–2 business days after you submit.
- One product is enough to test the flow - a title, a price and one photo.