
Seller Signup & KYC
After you sign up, a short KYC verifies your business so you can start selling and the steps you see depend on how you choose to sell.
When you create your Mystore seller account, you’re guided through Complete Your Seller KYC a few quick steps that take about 5 minutes. Your progress is saved automatically, so you can leave and come back anytime.
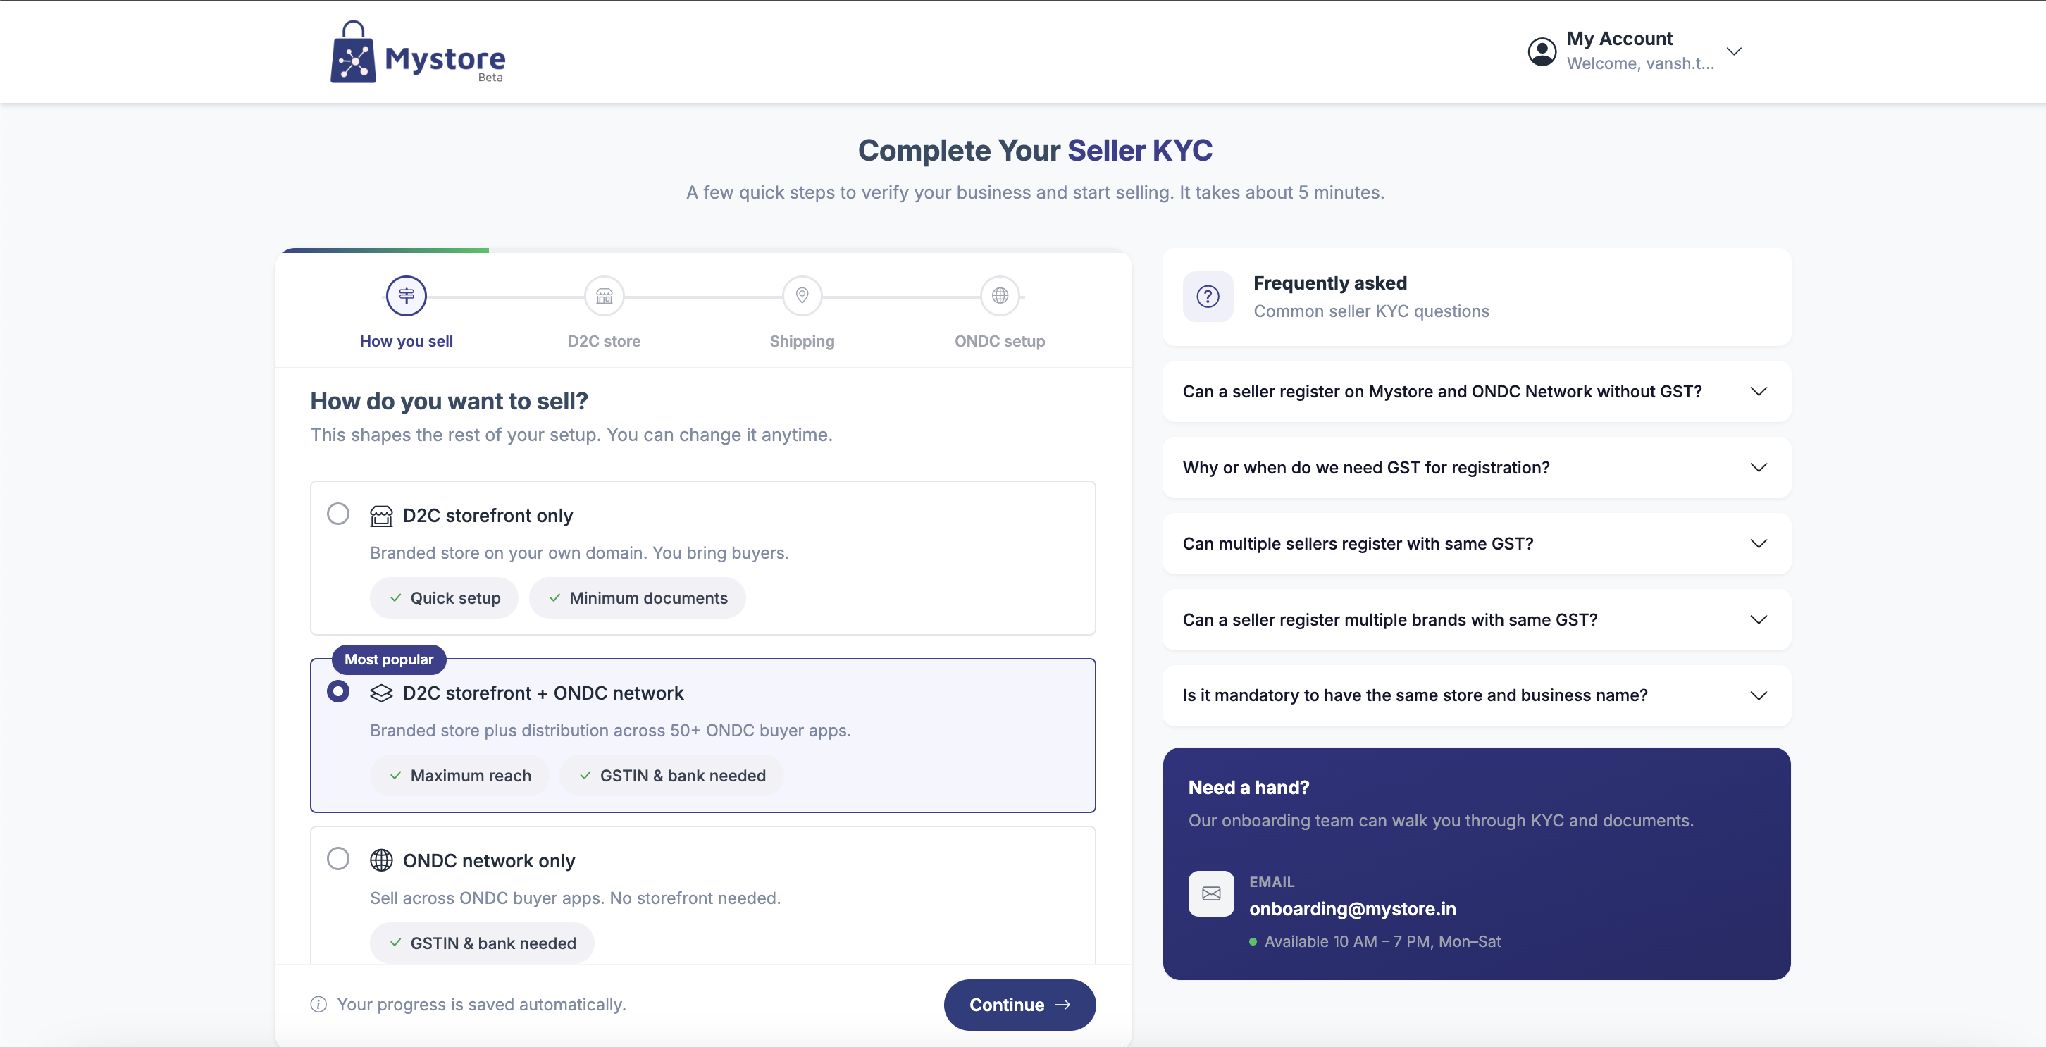
1. Choose how you want to sell
This is the first step, and it decides which steps come next. You have three options:
- D2C storefront only: A branded store on your own domain, where you bring the buyers. Quick setup, minimum documents.
- D2C storefront + ONDC network (Most popular): Your branded store plus distribution across 50+ ONDC buyer apps. Maximum reach; needs GSTIN & bank.
- ONDC network only: Sell across ONDC buyer apps with no storefront. Needs GSTIN & bank.
Pick one and click Continue.
2. The steps for your path
The remaining steps change depending on what you chose:
Your choice | Steps you’ll complete |
|---|---|
D2C storefront only | How you sell → D2C store → Shipping |
D2C storefront + ONDC | How you sell → D2C store → Shipping → ONDC setup |
ONDC network only | How you sell → Shipping → ONDC setup |
In short: D2C-only sellers skip ONDC setup; ONDC-only sellers skip the D2C store step. Everyone sets a pickup location (Shipping). Work through whichever of the sections below apply to you.
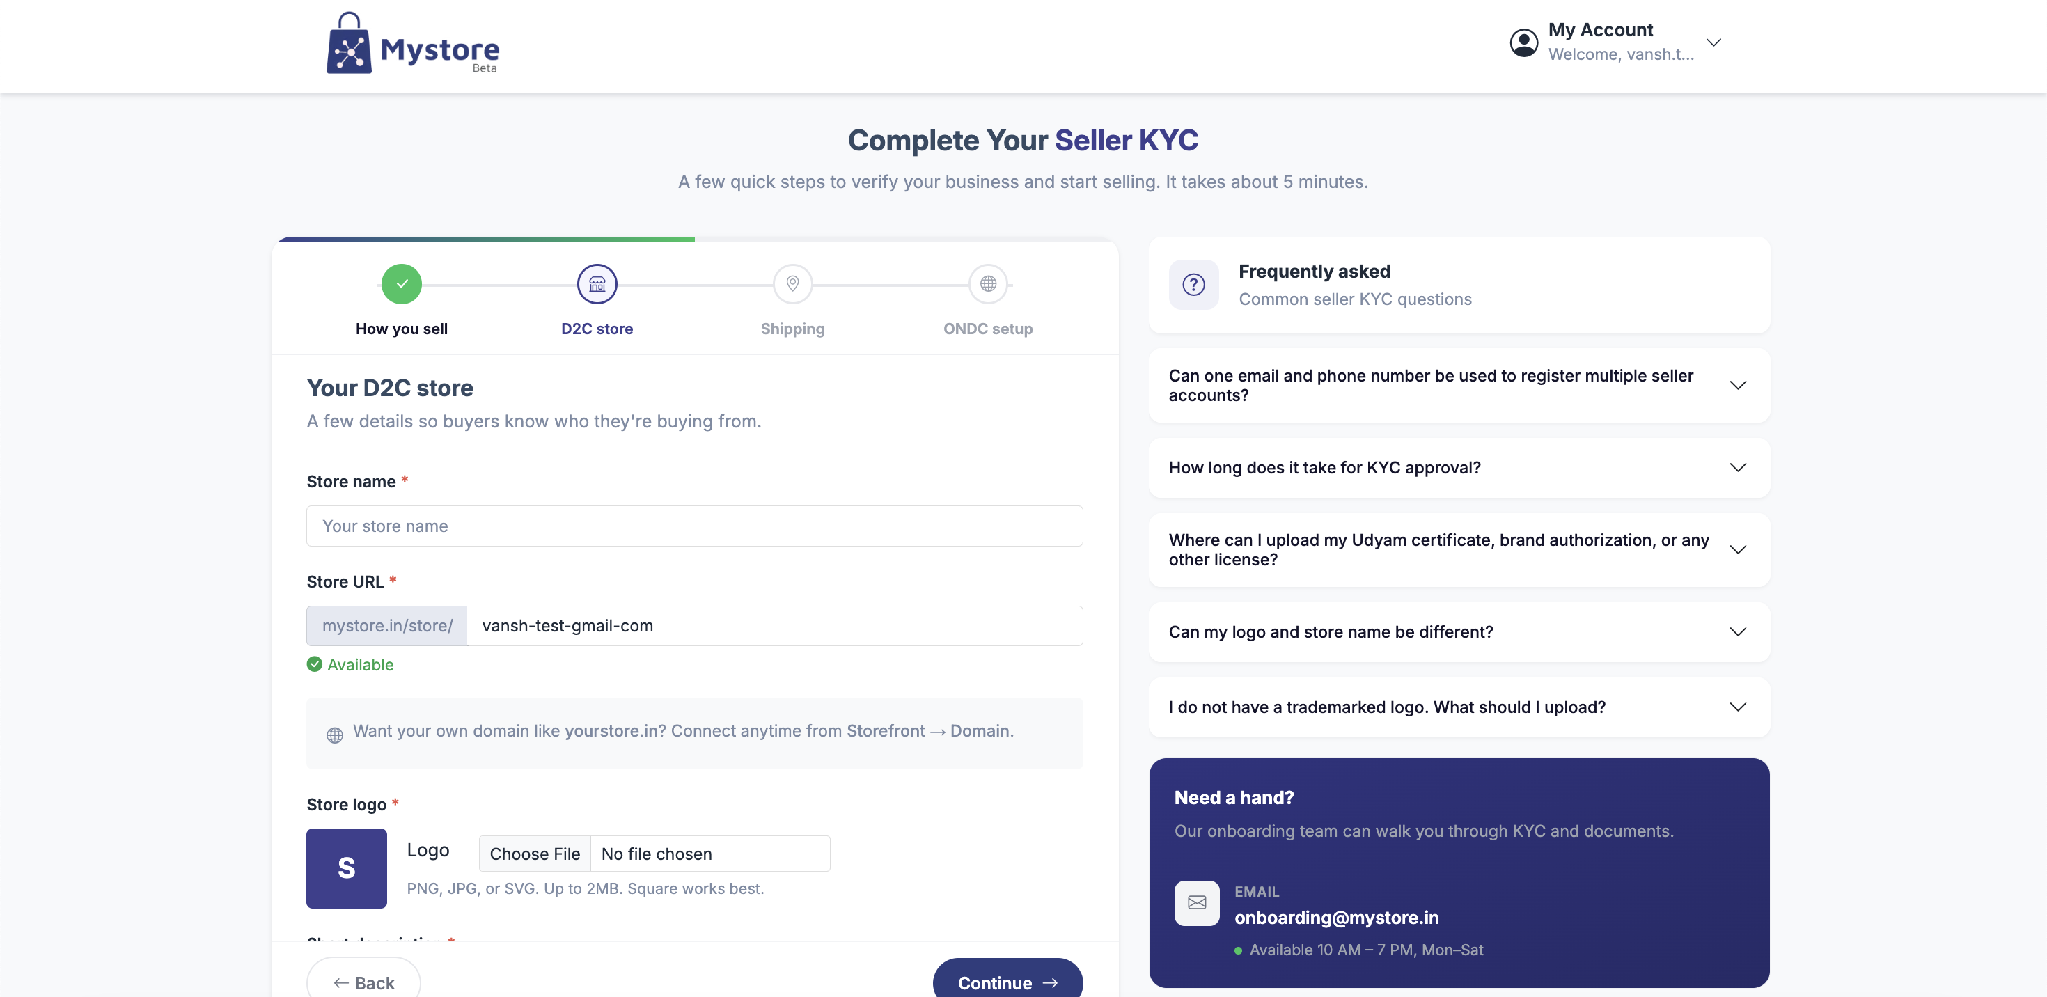
3. Set up your D2C store
(For D2C storefront paths.) A few details so buyers know who they’re buying from:
- Store name: The name buyers will see.
- Store URL: Your store address, e.g. mystore.in/store/your-name. A green “Available” means the name is free.
- Store logo: PNG, JPG, or SVG, up to 2 MB. A square image works best.
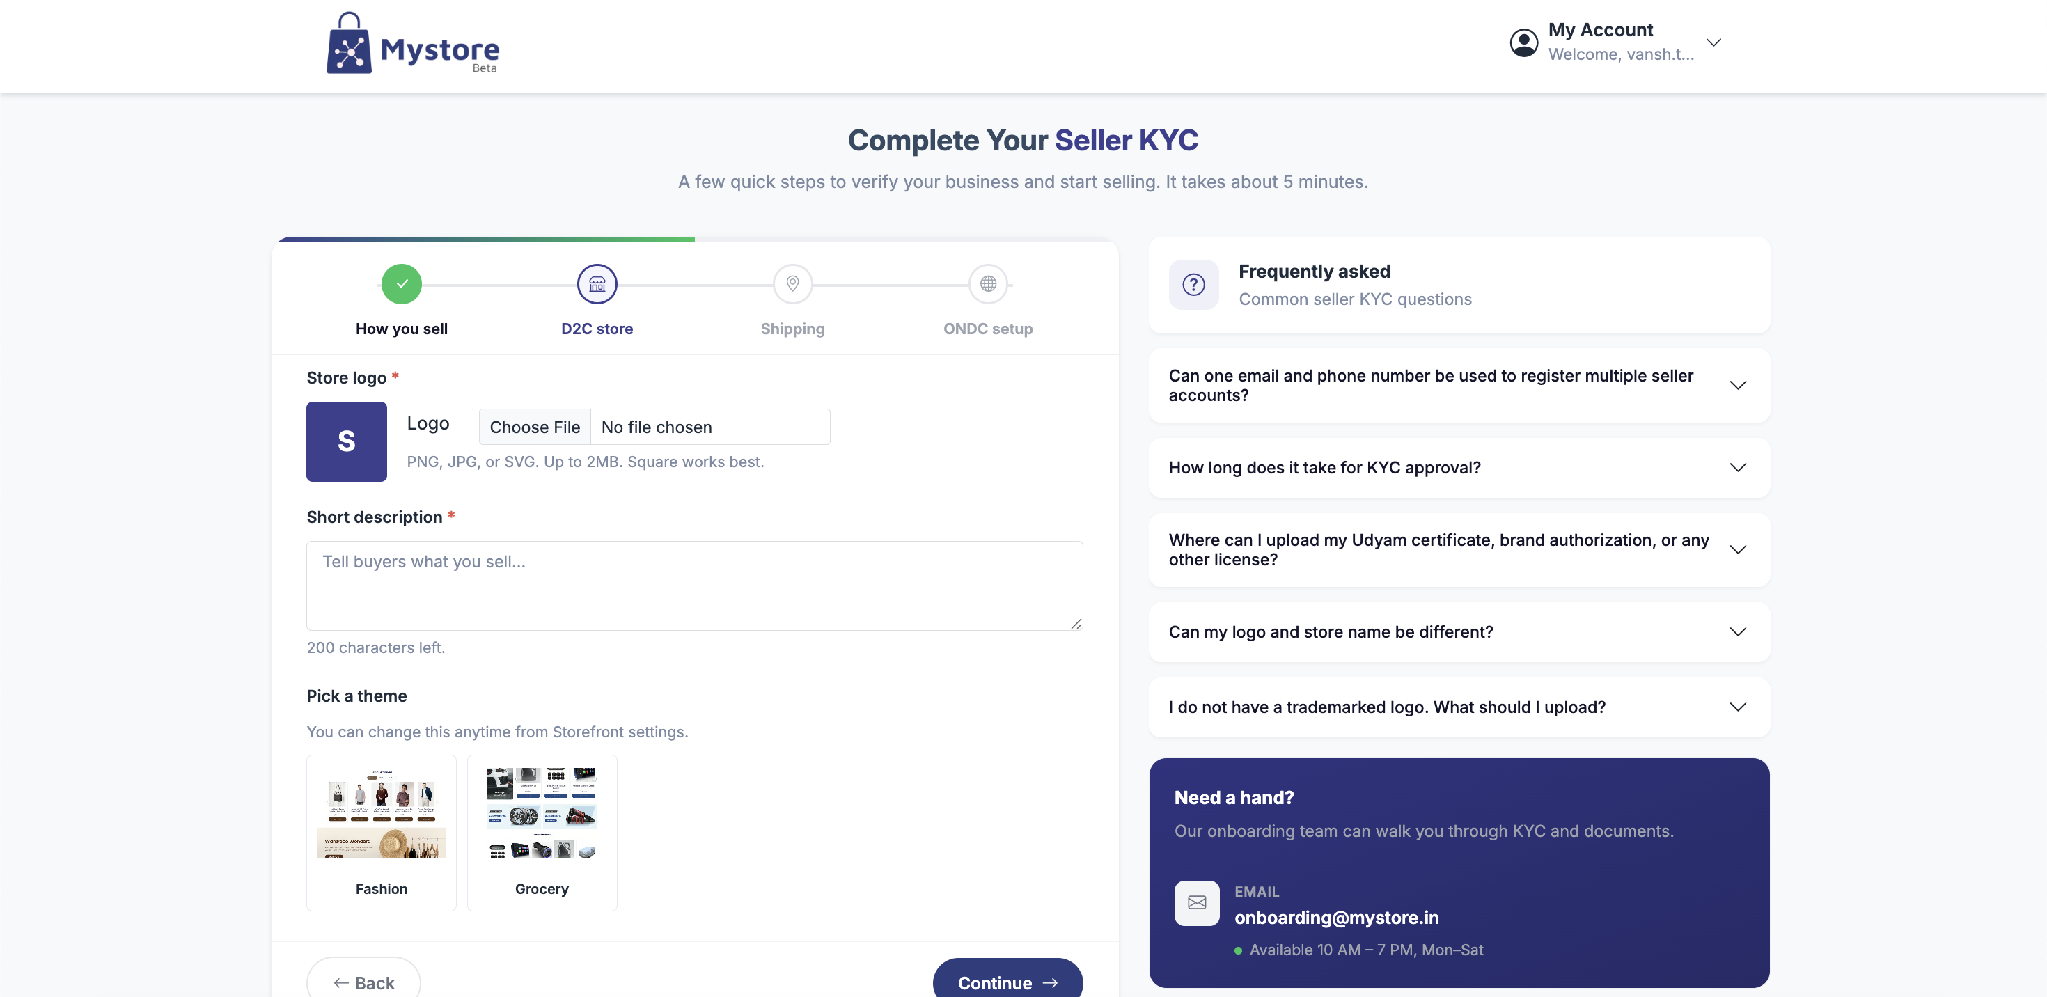
- Short description: Up to 200 characters telling buyers what you sell.
- Pick a theme: Choose a look such as Fashion or Grocery you can change it later from Storefront settings.
Then click Continue.
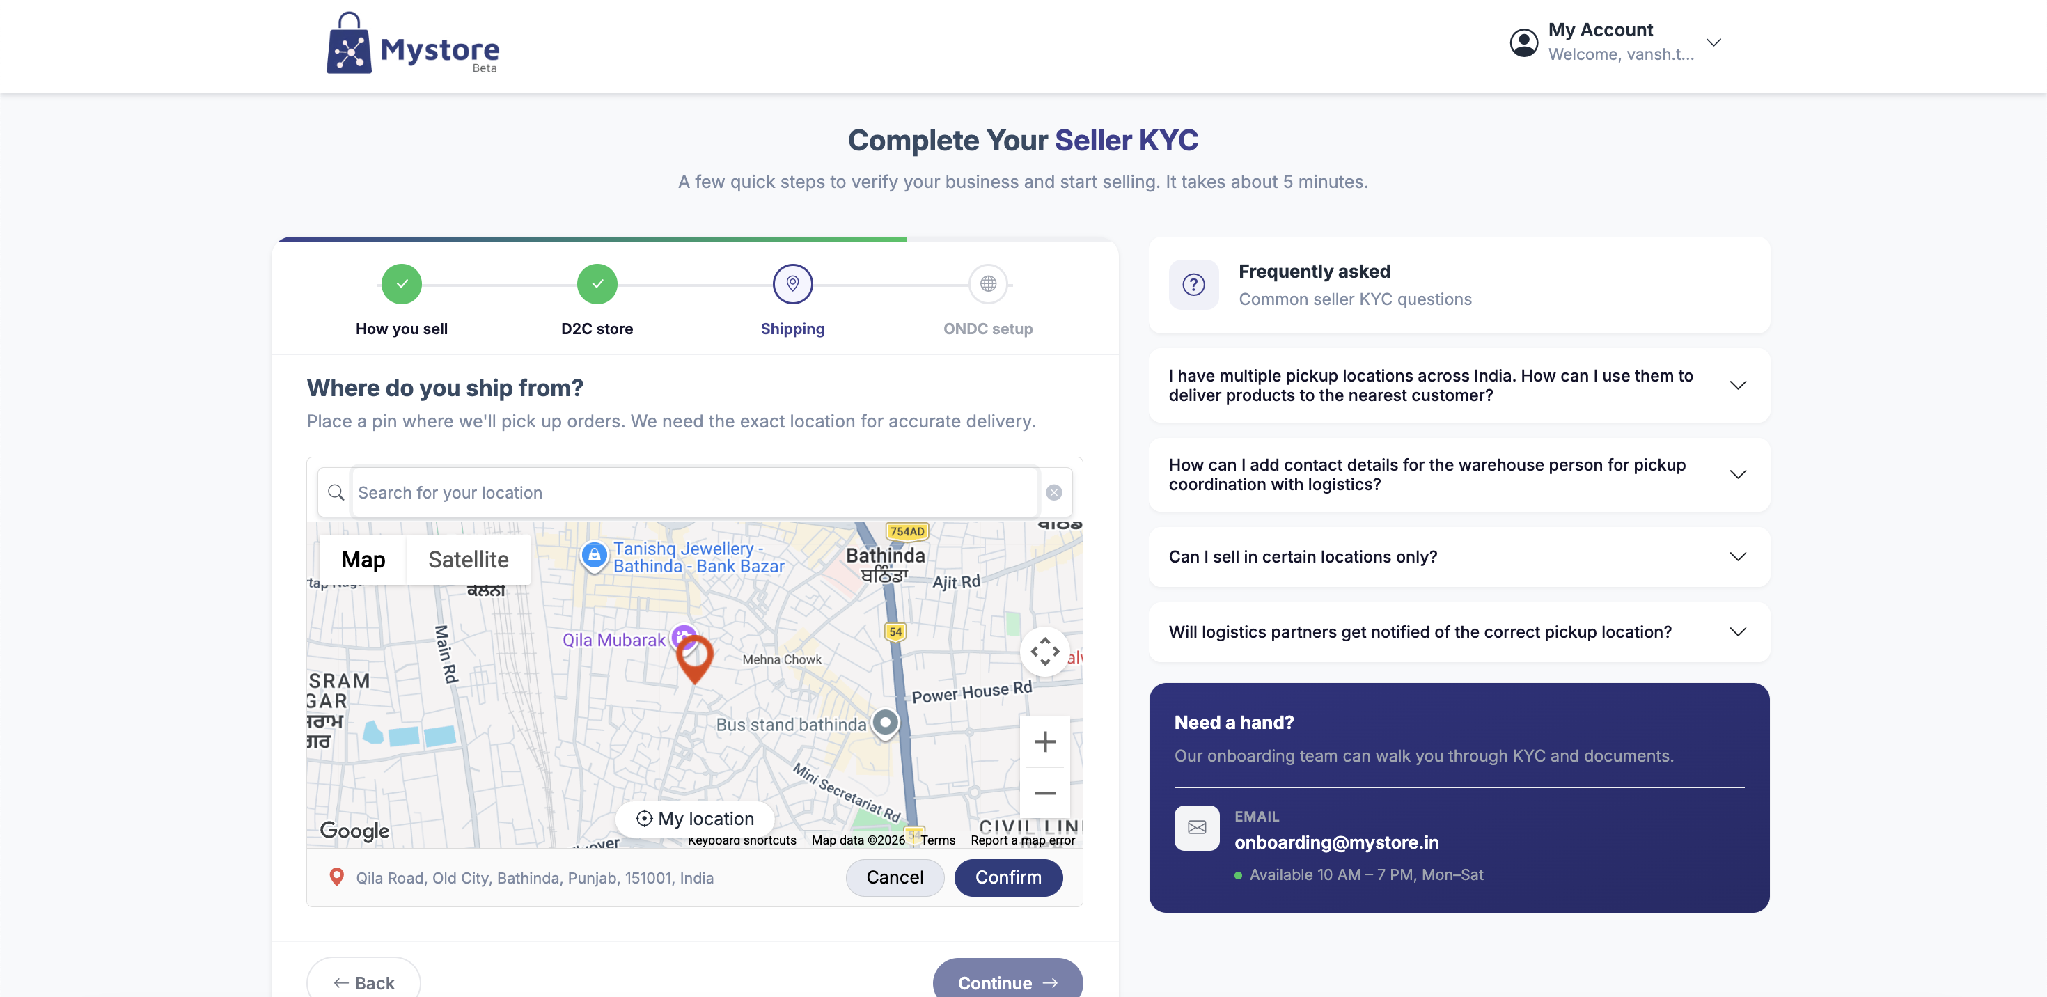
4. Add your pickup location
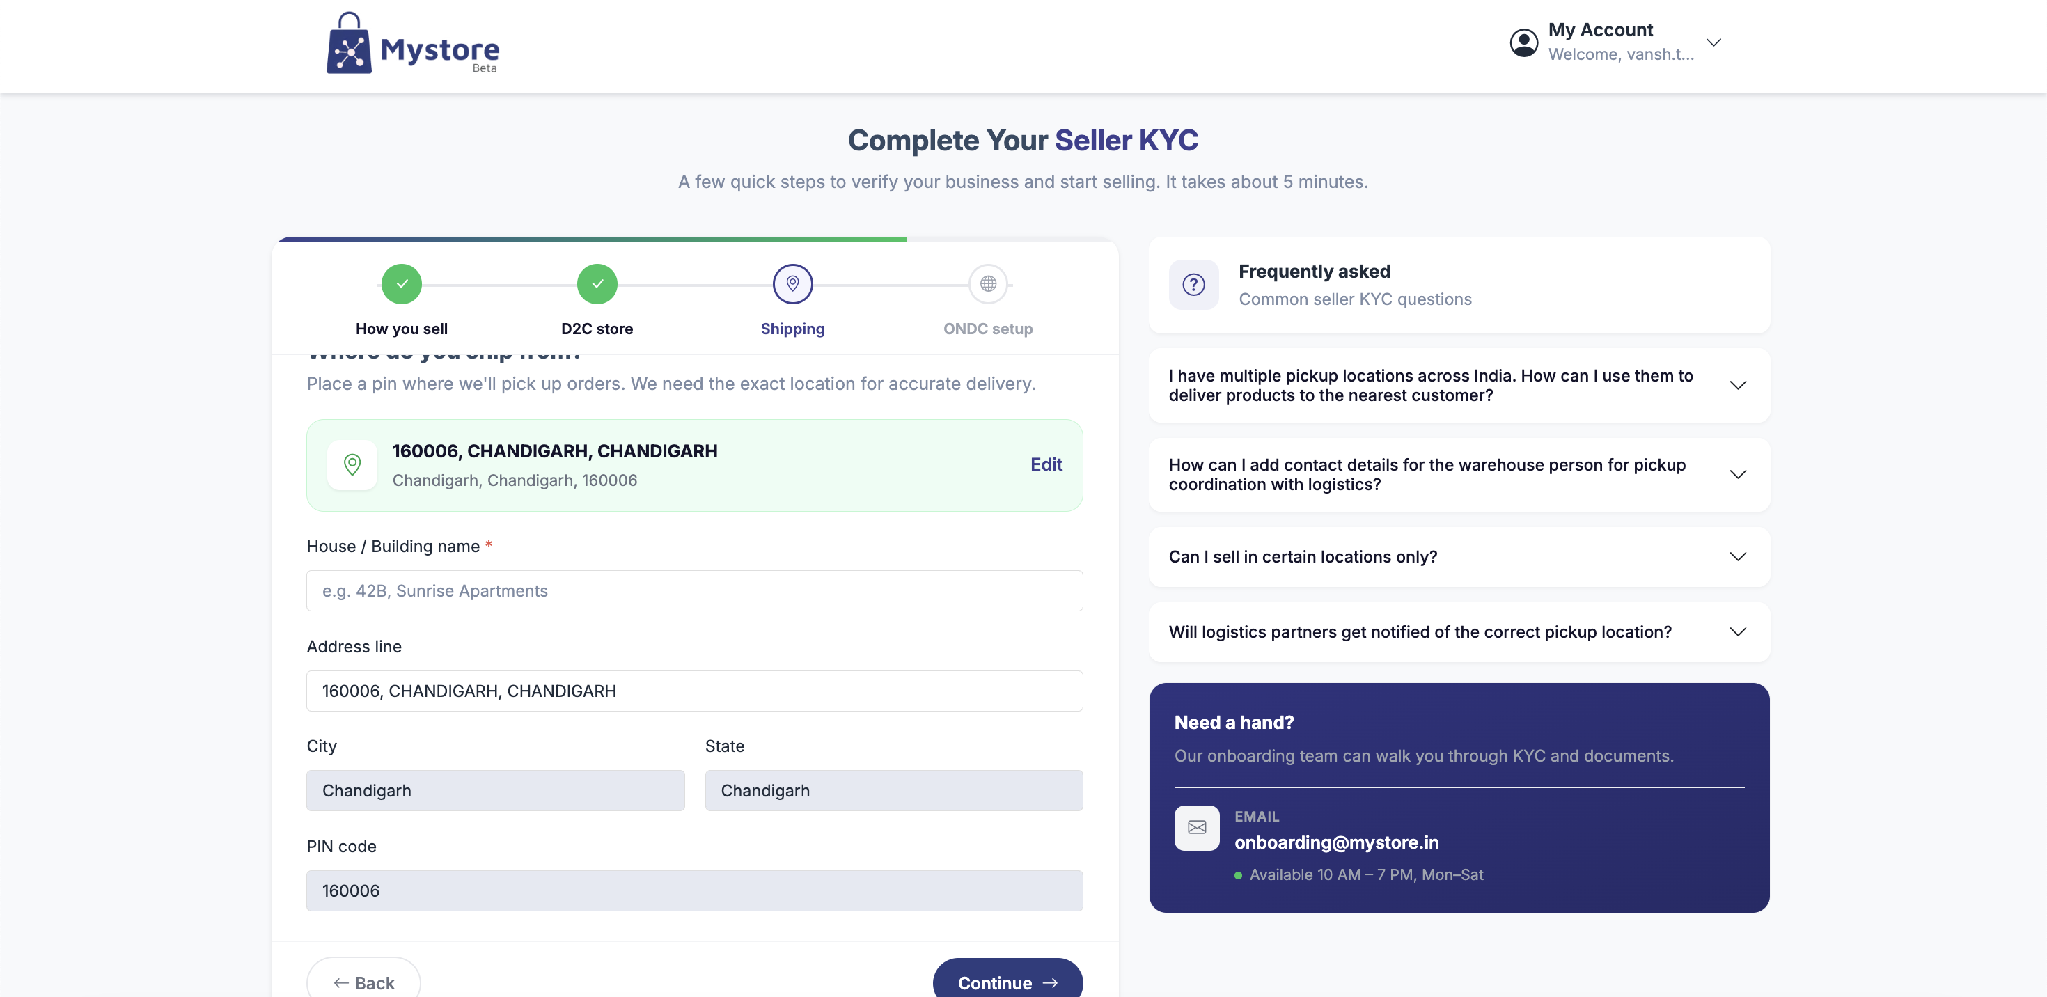
(All sellers.) Place a pin where we’ll pick up orders the exact location helps ensure accurate delivery.
- Search for your location, or drag the pin / tap My location on the map, then click Confirm.
- Fill in the House / Building name, Address line, City, State, and PIN code (some fields fill in automatically from the pin).
- Click Continue.
Drop a pin on the map to mark your pickup point, then Confirm.
 Confirm the address details for the pickup location.
5. Enable ONDC network
(For ONDC paths.) Reach buyers across 50+ ONDC apps. You can skip this and enable it anytime later.
Have it ready? If you already have your GSTIN and bank details ready, add them now your store goes live across ONDC apps once approved (usually 1–2 business days).
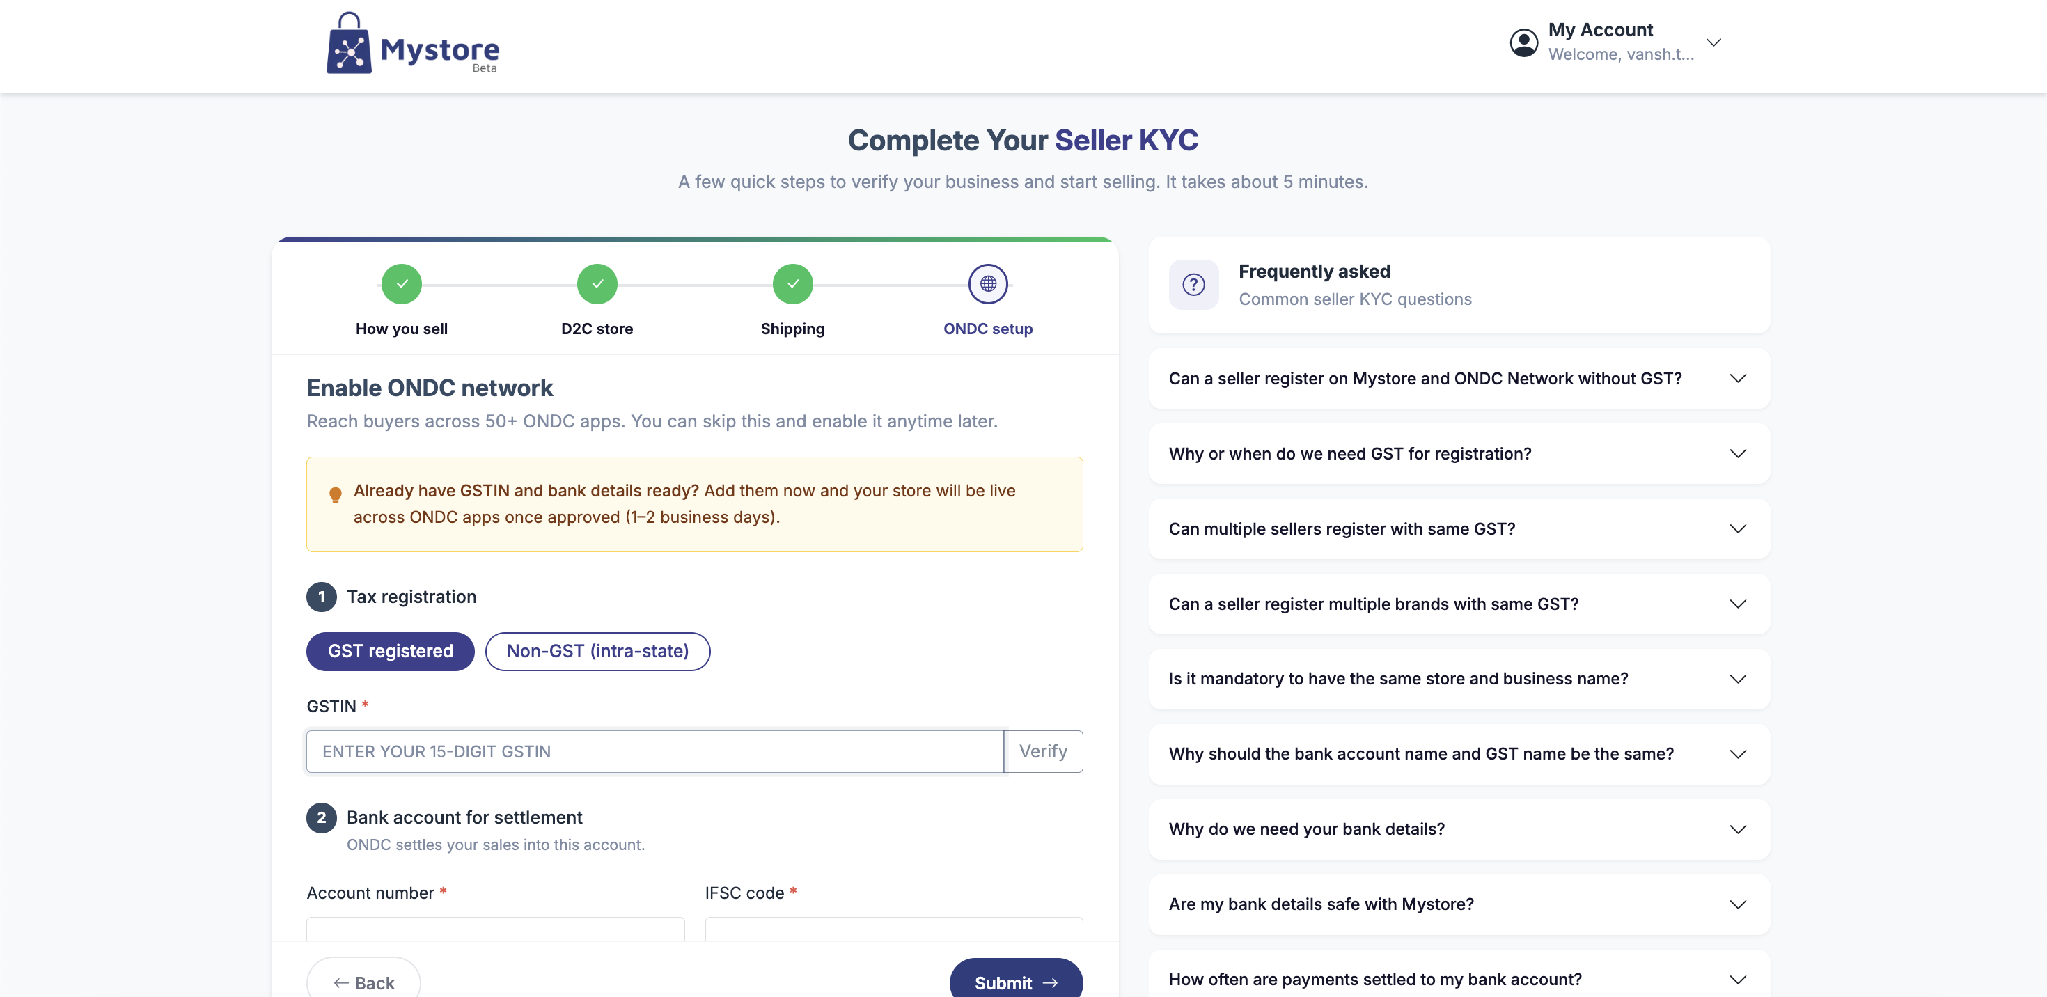
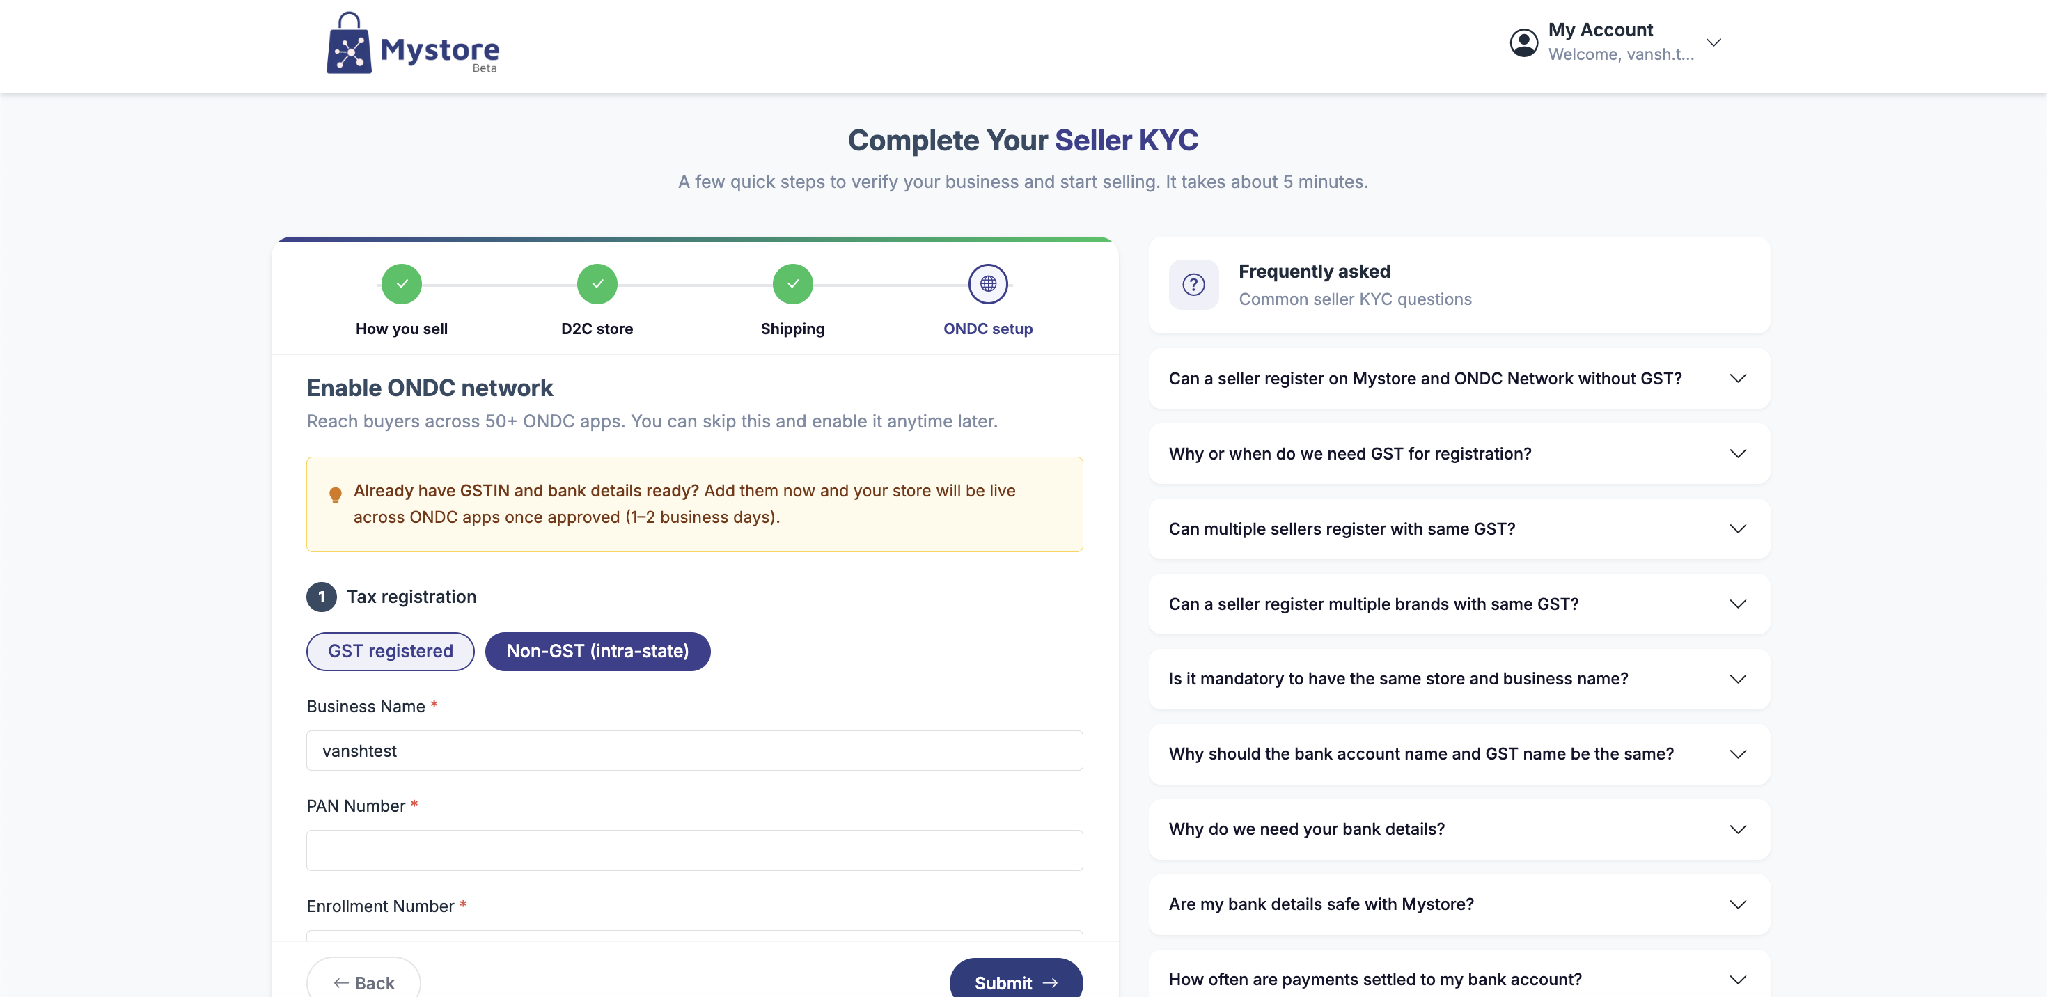
Step 1 Tax registrationChoose GST registered or Non-GST (intra-state):
- GST registered: Enter your 15-digit GSTIN and click Verify.
- Non-GST (intra-state): Enter your Business Name, PAN Number, and Enrolment ID / UIN.
Tax registration GST registered: enter and verify your GSTIN.
Tax registration Non-GST: enter business name, PAN, and enrolment details.
Step 2 Bank account for settlement
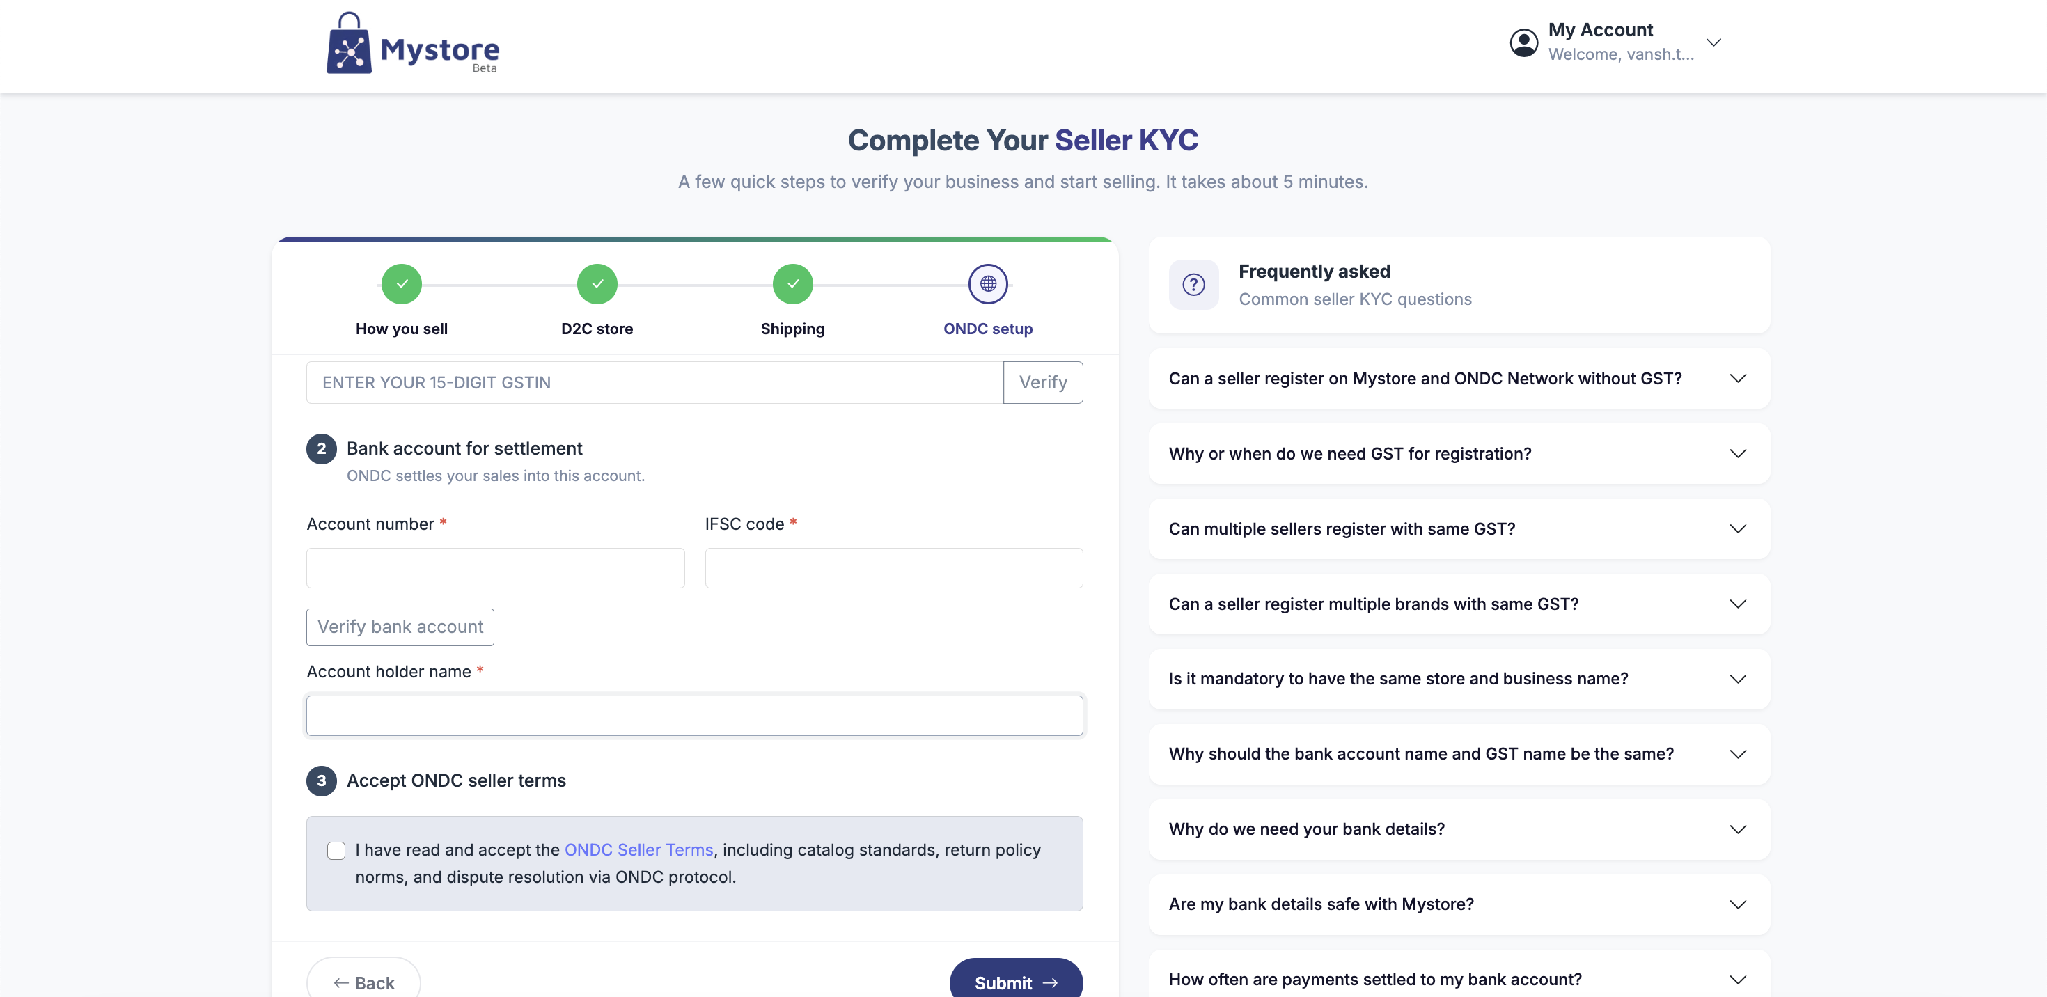
ONDC settles your sales into this account. Enter your Account number and IFSC code, click Verify bank account, then enter the Account holder name.
Step 3 Accept ONDC seller terms
Tick the box to accept the ONDC Seller Terms (catalog standards, return-policy norms, and dispute resolution via the ONDC protocol), then click Submit.Bank account for settlement and accepting the
ONDC seller terms.
6. Getting help while you set up
Frequently asked: A panel on the right answers common questions for each step GST, KYC approval time, logos, pickup locations, bank details, and more.
Need a hand?: Our onboarding team can walk you through KYC and documents. Email [email protected], available 10 AM – 7 PM, Mon–Sat.
7. Which option needs whatHandy tips
Option | Storefront | ONDC reach | GSTIN & bank |
|---|---|---|---|
D2C storefront only | Yes | No | Not required |
D2C storefront + ONDC | Yes | Yes (50+ apps) | Required |
ONDC network only | No | Yes (50+ apps) | Required |
Handy tips
- Not sure which to pick? D2C storefront + ONDC is the most popular. You can also start D2C-only and add ONDC later.
- Your progress saves automatically — you can leave and return without losing anything.
- Keep documents handy if you’re enabling ONDC: your GSTIN (or PAN + enrolment), and bank account details.
- A square logo and a clear short description help buyers trust your store.
- ONDC approval usually takes 1–2 business days after you submit.